

Quick Answer (Overview): A ceiling medallion is a decorative architectural ring that mounts above a light fixture. The most important step is choosing the correct size. A standard 120 to 200 square foot room needs a 20 to 24 inch medallion. Polyurethane is the best material because it weighs under five pounds and requires only construction adhesive for a secure hold. Always shut off power at the breaker before starting your project. This ceiling medallions buying guide 2026 covers everything you need to know.
What Are Ceiling Medallions Used For?
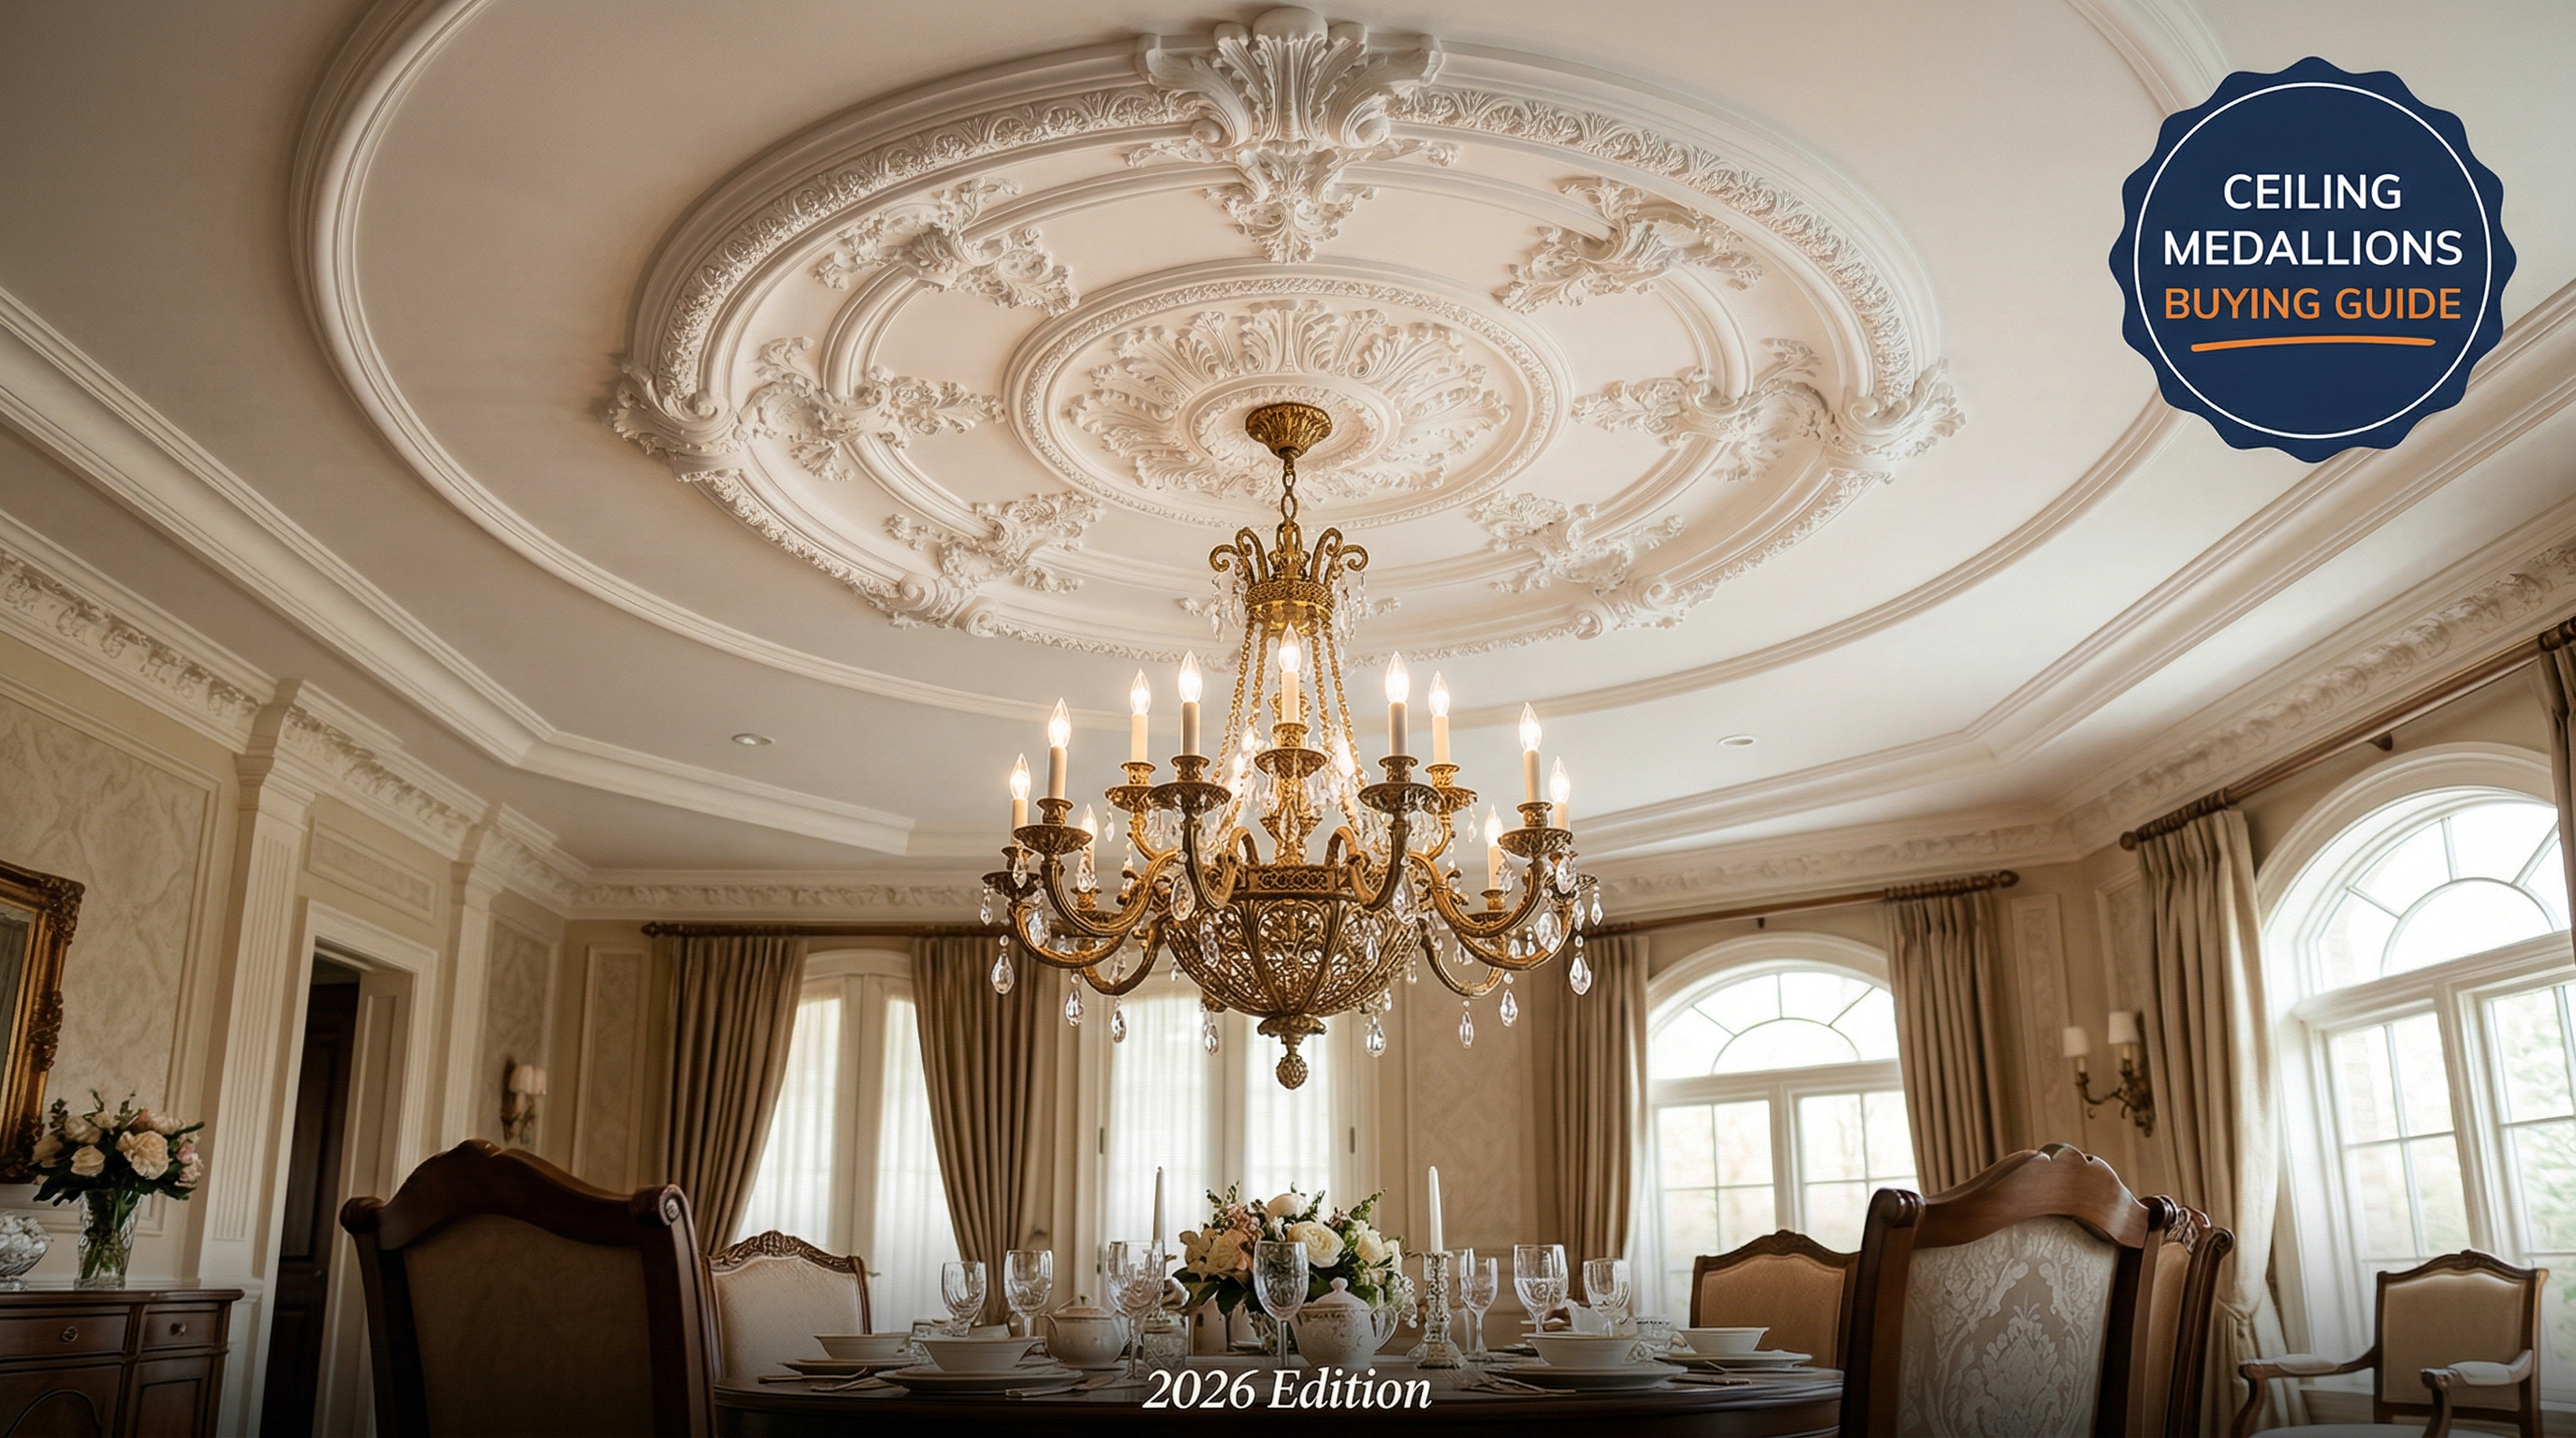
A ceiling medallion serves as an elegant decorative focal point. It frames your light fixture and visually anchors it to the ceiling above. This simple architectural detail stops a chandelier from floating awkwardly in a massive sea of white drywall.
Originally craftsmen hand poured plaster medallions directly onto Victorian ceilings. Today most modern options consist of molded polyurethane. This incredible material replicates intricate plaster details perfectly without adding crushing weight to your ceiling joists.
One single ring of decorative ceiling trim changes the whole feel of a space. You can transform a basic builder grade room into a custom space in under an hour.
How Do I Choose The Right Size Ceiling Medallion?
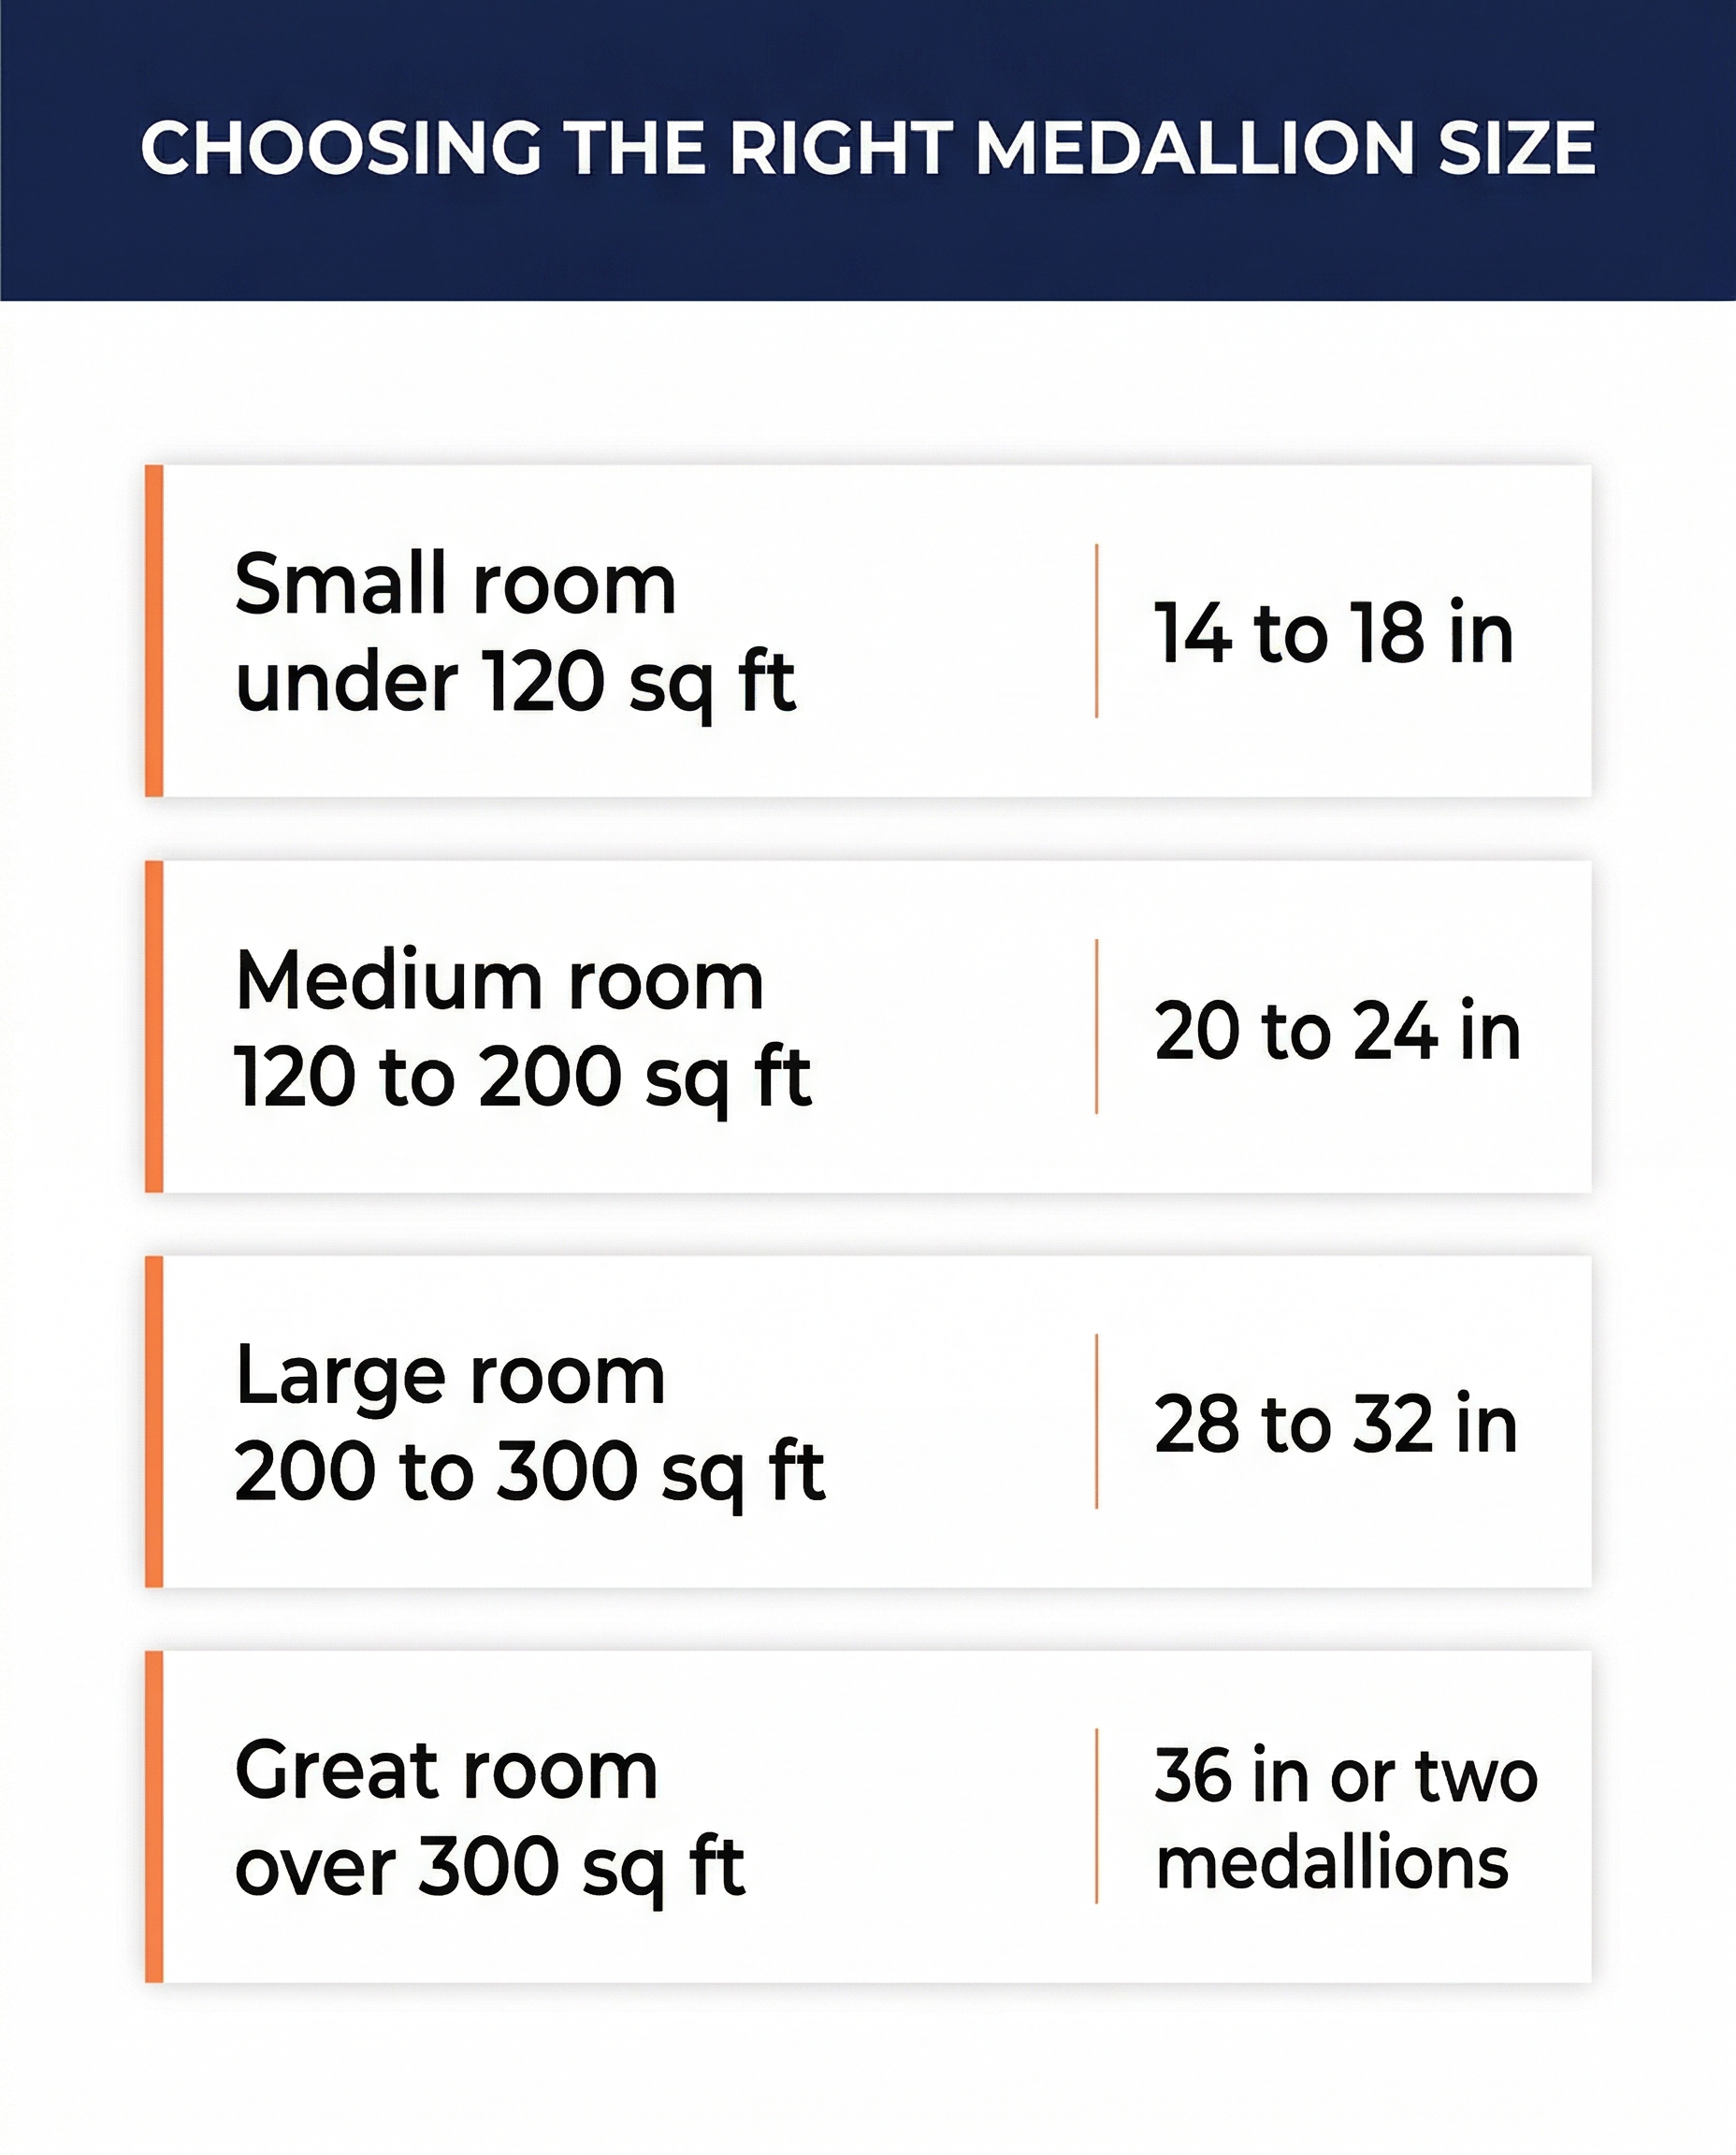
Sizing is the number one area where excited homeowners make critical mistakes. Buying too small makes the medallion look like a tiny drink coaster stuck to the ceiling. Bigger is almost always better.
Our customer service team at Talissa Decor uses room square footage to calculate the perfect fit. If your specific light fixture is unusually small, you should size the medallion to be roughly twice the diameter of the fixture canopy.
Consult this ceiling medallions buying guide 2026 sizing chart whenever you plan a new room design. Always go up one full size if you find yourself debating between two different measurements.
| Room Size (Square Feet) | Recommended Medallion Diameter | Typical Room Type |
|---|---|---|
| Under 120 sq ft | 14 to 18 inches | Powder room, small foyer |
| 120 to 200 sq ft | 20 to 24 inches | Standard bedroom, dining nook |
| 200 to 300 sq ft | 28 to 32 inches | Large living room, formal dining room |
| Over 300 sq ft | 36 inches or larger | Great room, two story entryway |
Which Medallion Style Matches My Home?
Matching your new chandelier ceiling medallion to your existing architecture creates a cohesive and expensive look. You want the ceiling feature to feel like it was built with the house originally.
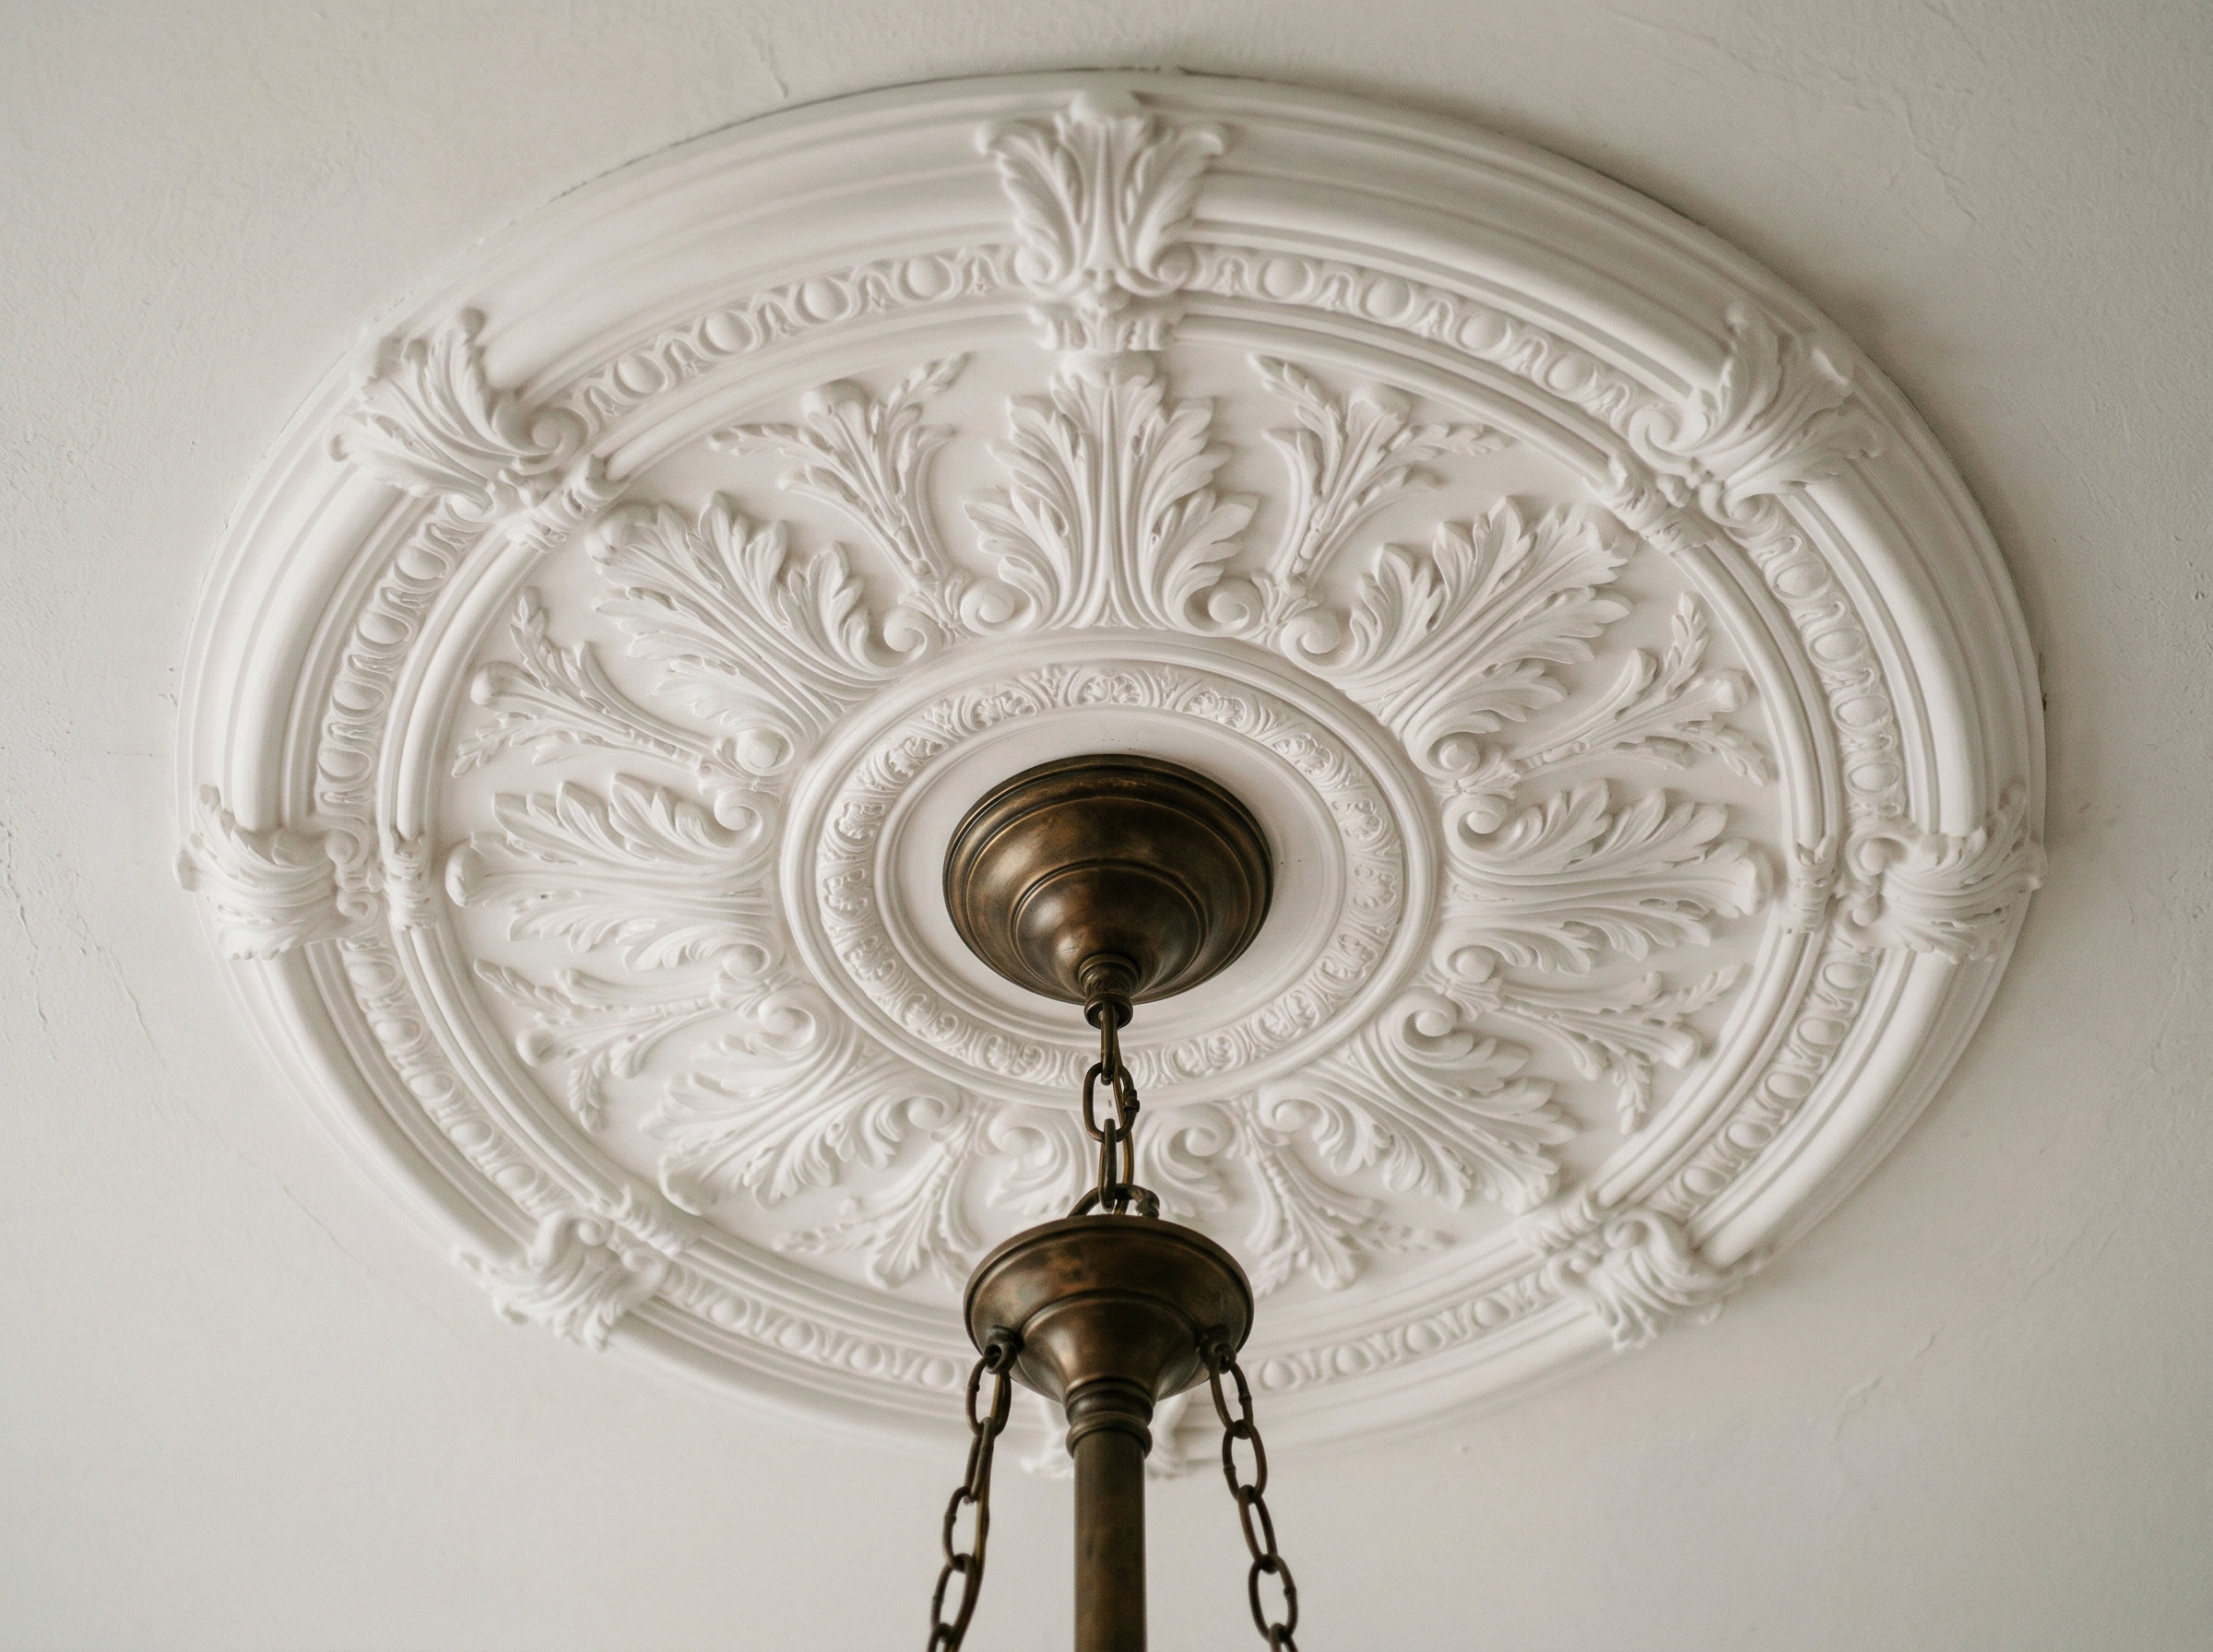
- Traditional or Victorian: These feature heavy floral motifs, acanthus leaves, and deep rosette patterns. They look spectacular in historic homes or formal dining rooms featuring beautiful crown molding.
- Transitional: These rely on gentle scallops or clean concentric rings. This is your absolute safest choice if you are unsure of your exact interior style.
- Modern: Contemporary rooms demand smooth domes or flat rings with minimal relief details. They add subtle depth without fighting clean lines and minimalist furniture.
We see transitional styles dominating the ceiling medallions buying guide 2026 trend forecasts. They blend easily with almost any light fixture on the market today.
Should I Buy Polyurethane, Plaster, Or Foam?
Polyurethane remains the absolute best material for residential ceiling upgrades. It holds crisp geometric shapes, takes paint beautifully, and completely ignores indoor humidity changes.
When you compare polyurethane medallion sizes, you will find a standard 24 inch model weighs just three to five pounds. This means you can install it using only basic construction adhesive. You do not need heavy duty drywall anchors or complicated structural supports.
Plaster medallions look authentic but weigh a massive twenty pounds. They shatter instantly if dropped and require drilling into ceiling joists. Foam options are incredibly cheap but lack the deep relief details necessary for a premium architectural look.

What Are The Steps To Install A Ceiling Medallion Fast?
You can complete your ceiling medallion installation in roughly forty five minutes. You only need a few simple hand tools and a tube of high quality adhesive.
- Turn off the breaker: Do not rely on the wall switch alone. Test the wires with a non contact voltage tester to confirm the power is entirely dead before touching anything.
- Drop the canopy: Unscrew the fixture canopy plate and carefully let the light hang safely supported by the internal wires.
- Cut the center hole: Most medallions ship with a center hole sized for a standard junction box. If your box is larger, cut the center opening with a sharp utility knife.
- Apply adhesive: Run one continuous bead of construction adhesive around the outer back edge. Add a second thick bead near the center hole for extra stability.
- Press and hold: Slide the medallion over the hanging wires and press it firmly against the ceiling drywall. Hold it steady for sixty full seconds.
- Secure and seal: Reinstall the light canopy over the center hole. Run a thin bead of flexible white painter caulk around the outer edge to hide the ceiling seam.
Many readers of this ceiling medallions buying guide 2026 are pleasantly surprised by how fast the adhesive cures. Always dry fit your piece before applying any glue to avoid messy mistakes. If you are doing larger renovations, you can review our standard installation guides for more tips.
What Are The Most Common Installation Mistakes?
Homeowners usually get the physical installation right but fail on the critical finishing details. Skipping small steps will make your brand new fixture look cheap and unfinished.
- Buying too small: The single most common mistake is undersizing. When in doubt, go up one full size.
- Skipping the caulk line: A dark shadow gap between the medallion and the ceiling is an immediate eyesore. Caulk takes exactly two minutes and makes the piece look like integrated architecture.
- Painting before installing: You should apply paint only after the installation is complete. This allows you to paint over the white caulk line and the medallion at the exact same time.
- Using too little adhesive: One thin bead means the medallion can sag at the edges over time. Always use two generous beads of glue.
Keep this ceiling medallions buying guide 2026 handy during your next weekend project. One perfectly placed ring of trim will permanently elevate your favorite room.
Frequently Asked Questions
Do I Need An Electrician To Install A Ceiling Medallion?
Not necessarily. You can install a medallion without ever disconnecting wires by carefully working around the canopy plate. If you are not comfortable handling the fixture at all, an electrician can install the medallion quickly.
Can I Install A Medallion On A Textured Ceiling?
Yes. Apply extra adhesive to compensate for the uneven contact surface. You can also lightly sand the texture under the medallion footprint with a hand sanding block before installation.
How Much Weight Can A Polyurethane Medallion Hold?
The medallion itself is strictly decorative and not load bearing. Your light fixture must still be supported by the existing electrical box mounted securely to the joists.
Can I Paint A Polyurethane Medallion Gold Or Another Color?
Yes. Polyurethane takes both latex and oil based paint beautifully. Metallic finishes look excellent on a primed white medallion.
What If My Ceiling Is Not Flat?
Slight unevenness is fine because the adhesive will easily compensate. If your ceiling has a real dip, plan to use extra adhesive on the high side to keep the medallion level while the glue cures.

Written by
David C.
Interior style writer and home decor enthusiast with 8 years of hands-on renovation experience
David writes about interior style and home transformation projects, focusing on budget-friendly ways to elevate living spaces. He has renovated three homes personally and shares practical insights on material selection, installation techniques, and design coordination. Based in Toronto, he covers trends relevant to Canadian homeowners.