 Largest Ceiling
 CALL :
 About us
 FAQs
 Gallery
 Contact



 Ceiling Planks
 2×2 PVC Ceiling Tiles
 Styrofoam Ceiling Tiles
 Wall Mural
 3D Wall Panels
 Crown Moldings
 Faux Wood Beams
 Other Products

Ceiling Plank Layout: Which Direction Should the Boards Run?
Ceiling plank direction decides whether a room feels long, wide, tall or cozy, and it is easy to settle before a single board goes up. With lightweight wood-look foam planks, nothing hidden above the ceiling forces your hand, so the choice is yours. This guide shows how to pick the direction that suits your room, where to start, and how to plan your rows so the last one is not a thin sliver.
A plank ceiling works a bit like stripes on a shirt. Lines running one way pull the eye in that direction, and lines running the other way do the opposite. Once the planks are glued, changing your mind means pulling them off, so ten minutes of planning now saves an afternoon later.
Start with the room, not the boards
Stand in the doorway you use most and look up. Three things matter more than anything else on your list: the shape of the room, where the light comes from, and the first view someone gets when they walk in.
Planks create strong lines, and those lines point somewhere. In a long, narrow room, planks running lengthwise lead the eye down the room and make it feel even longer. Planks running across the short width break that tunnel up and make the room feel wider and a little more relaxed. Neither one is wrong. You are choosing which quality you want more.
Light matters too. Pale or whitewash planks catch daylight and carry it along the grain, so a plank line pointing toward a window tends to look like it is drawing daylight into the room. Planks that run parallel to a window wall can make the light seem to wash across the ceiling instead. If your main window sits on a short wall, decide which of those two looks you prefer before you pick a direction.
Finally, check fixtures. Recessed lights, a ceiling fan box or a pendant all need cut-outs, and a cut-out that lands in the middle of a plank is easier to trim than one that falls exactly on a joint. Mark their positions on a simple sketch before you commit.
Which way to run the boards in common rooms
Long, narrow living rooms and hallways
Run the planks along the length if you want the room to feel longer and more directional, which suits a hallway or an open-plan space that flows toward a view. Run them across the width if the room already feels like a corridor and you want it to feel less tunnel-like. In a hallway, lengthwise planks usually read as intentional and tidy.
Square rooms
A square room has no long dimension to emphasize, so use the focal point instead. Point the planks toward the window wall, the fireplace or the main seating area so the ceiling quietly supports the layout of the furniture below it.
Open-plan kitchen and living areas
When two zones share one ceiling, a single direction across both ties them together. Pick the direction that works for the larger zone and carry it through. Switching direction halfway usually looks like two separate projects.
Bedrooms and basements
In a bedroom, many people run the planks toward the head of the bed so the lines frame the headboard wall. In a basement with a lower ceiling, lengthwise planks help lift the eye instead of stacking horizontal lines above you. If you are covering a basement ceiling, the notes in our basement ceiling installation guide help with the prep.
Talissa Decor's own installation video below shows planks going up so you can picture the layout steps from this guide.
Why foam planks give you the choice
With solid wood boards, direction is often decided for you. Real timber is nailed into joists or furring strips, so the boards usually run across them. That is a big part of why a wood plank ceiling is such a serious carpentry job.
Talissa Decor planks are lightweight polystyrene boards that glue on, so no joist has to line up with your layout. Each plank measures 39.4 by 6.5 inches and is about 0.17 inches thick, which is why a utility knife is enough to trim them. For a fuller comparison between a wood install and the glue-up route, see our plank ceiling installation walkthrough.
One small caution. The surface still needs to be clean, dry and reasonably flat, and the adhesive should be one the foam tolerates. Talissa recommends Styro Pro or Acryl Pro for its planks. That choice is separate from direction, so settle it before you start gluing.
Pick the starting wall and snap a centre line
Once you know the direction, you need a starting point. Pick the wall people see most, or the straightest one, as your reference. Most rooms are not perfectly square, and a plank line that runs alongside the most visible wall will look right even if the opposite wall is a little off.
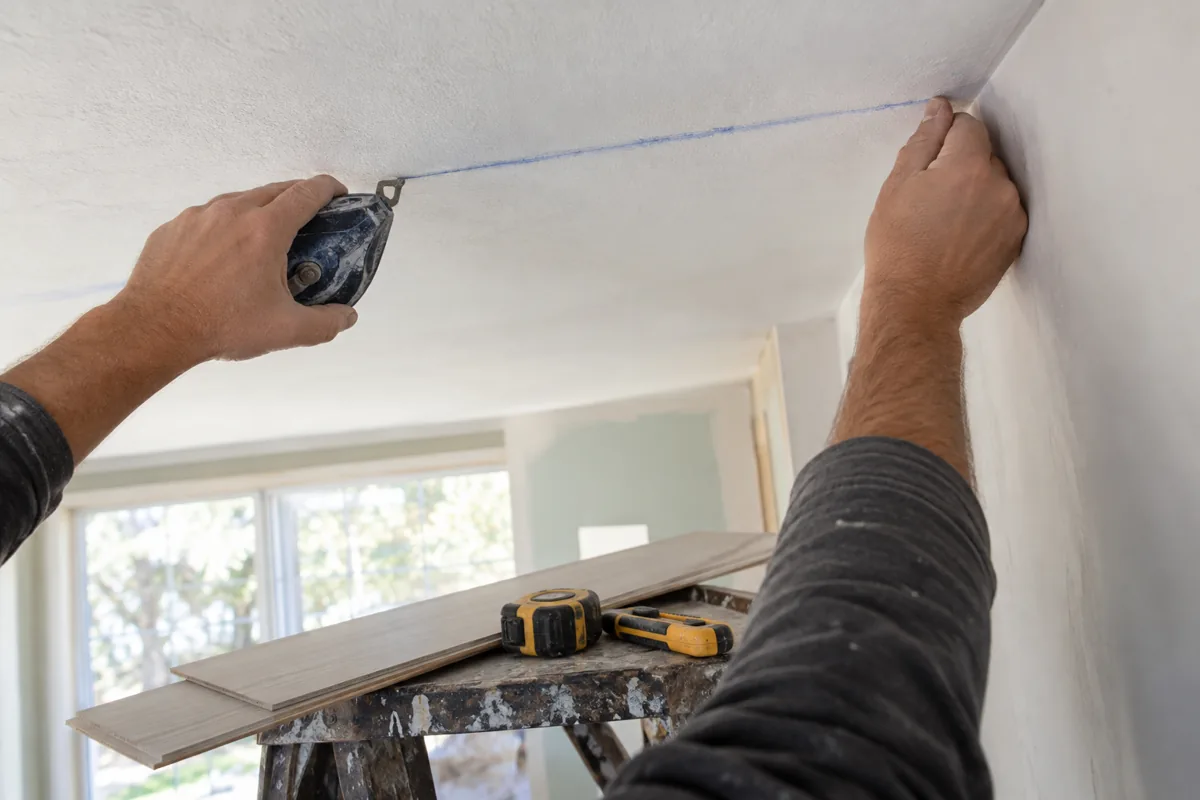
Talissa’s own foam installation guide starts the same way for tiles: draw a chalk line down the middle of the room and install outward from it. Planks work the same way. Snap one line along the centre of the room in the direction you picked, and a second line across it if you want to check that your rows stay square.
- Measure the room at both ends and in the middle, and write the numbers down.
- Snap the centre line with a chalk reel.
- Check that the line sits parallel to your reference wall by measuring at both ends.
- Place your first plank against the line and press it flat.
- Work out toward each side, one row at a time.
If you are working overhead on a stepladder, read the Canadian Centre for Occupational Health and Safety guidance on portable ladders first. Keep both feet on the ladder and move it instead of leaning.
Do the row math before you glue
This is the step that separates a polished ceiling from one that looks like it ran out of boards. Planks have a fixed width, so the room width rarely divides evenly, and the last row is where the leftover lands.
Here is a quick example. A room 138 inches wide, with planks about 6.5 inches across, fits 21 rows with 1.5 inches left over. A 1.5 inch sliver along the wall looks awkward and is hard to glue straight. Instead, work from the middle and trim the first and last rows evenly. Take 20 full rows, which cover 130 inches, and split the remaining 8 inches into two border rows of 4 inches each. Two matching borders look deliberate.
| Room width | Full rows | Leftover | Better plan |
|---|---|---|---|
| 138 in | 21 | 1.5 in | 20 full rows plus two 4 in border rows |
| 120 in | 18 | 3 in | 17 full rows plus two 4.75 in border rows |
Work the numbers for your own room before you cut anything. A pack of 12 covers about 21.5 square feet, and Talissa suggests ordering about 10 percent extra for a regular ceiling and more for an irregular one, so cuts and mistakes do not leave you short.
Stagger the end joints and plan around fixtures
Each plank is shorter than most rooms, so rows will have end joints. If neighbouring rows all join at the same spot, the ceiling reads like a grid and loses the look of boards laid at random. Stagger the joints so no two end joints in adjacent rows line up. Cutting a plank in half and starting the next row with the shorter piece is the simple way to do it.
Fixtures follow the same logic. Before you glue, hold a plank up to the ceiling where a light box sits and mark the cut. A utility knife and a straightedge handle foam cleanly.
Do the same around the edges. Whole planks go up first and cut pieces go last, which is how Talissa’s installation guide recommends working. If your walls have crown moulding, the finish detail in our video on tiles with existing crown moulding shows how the ceiling meets the wall.
Dry lay a test patch
Before you commit, lay six or seven planks on the floor in the direction you picked and stand at the doorway to look at them. Better yet, hold a few up against the ceiling in daylight and under the lamps you use at night. Wood-look finishes can shift in tone under different bulbs, and seeing the planks in your own room takes the guesswork out.
A ceiling plank sample kit lets you try the finish in your actual room before you order a full pack. Tape samples up in both directions if you cannot decide, then step back and see which version makes the room feel the way you want.
Layout mistakes that are easy to skip
- Starting from the corner. Walls drift, so a corner start can leave a wedge-shaped gap at the far side. A centre line spreads the error evenly.
- Ignoring the sliver. A final row only an inch or two wide is hard to cut and hard to glue straight. Rebalance the first and last rows instead.
- Gluing before dry laying. Check the pattern, fixtures and joints with dry planks first.
- Switching direction at a doorway with no plan. If the direction must change, break it at a natural line such as an archway or a beam.
- Forgetting the extra boxes. A short pack at the end of the job means waiting on shipping with half a ceiling done.
Take your measurements, run the row math and tape up a few samples. After that, the direction usually picks itself.
Quick questions
Should ceiling planks run the long way or the short way in a narrow room?
Both work, and they feel different. Running the planks along the long side leads the eye down the room and emphasizes length, which suits halls and open-plan spaces. Running them across the short side makes a narrow room feel a little wider. If you cannot decide, tape a few samples up both ways and look at them in daylight and lamplight. The one that makes the room feel the way you want is the right one for you.
Do the planks have to line up with the ceiling joists?
Not with glue-up foam planks. Real wood is nailed into joists or furring strips, so its direction is often decided by the framing. Foam planks are glued to a clean, flat surface, so you can choose the direction for the look you want. Always read the adhesive instructions and the notes on the product page for surface requirements before you start.
What if my last row ends up very thin?
Plan your rows before you glue anything. Divide the room width by the plank width, look at the leftover, and if it is small, trim your first and last rows to equal widths instead of leaving a sliver at one wall. Two matching borders look deliberate, and thin strips are the pieces most likely to lift or end up crooked.