

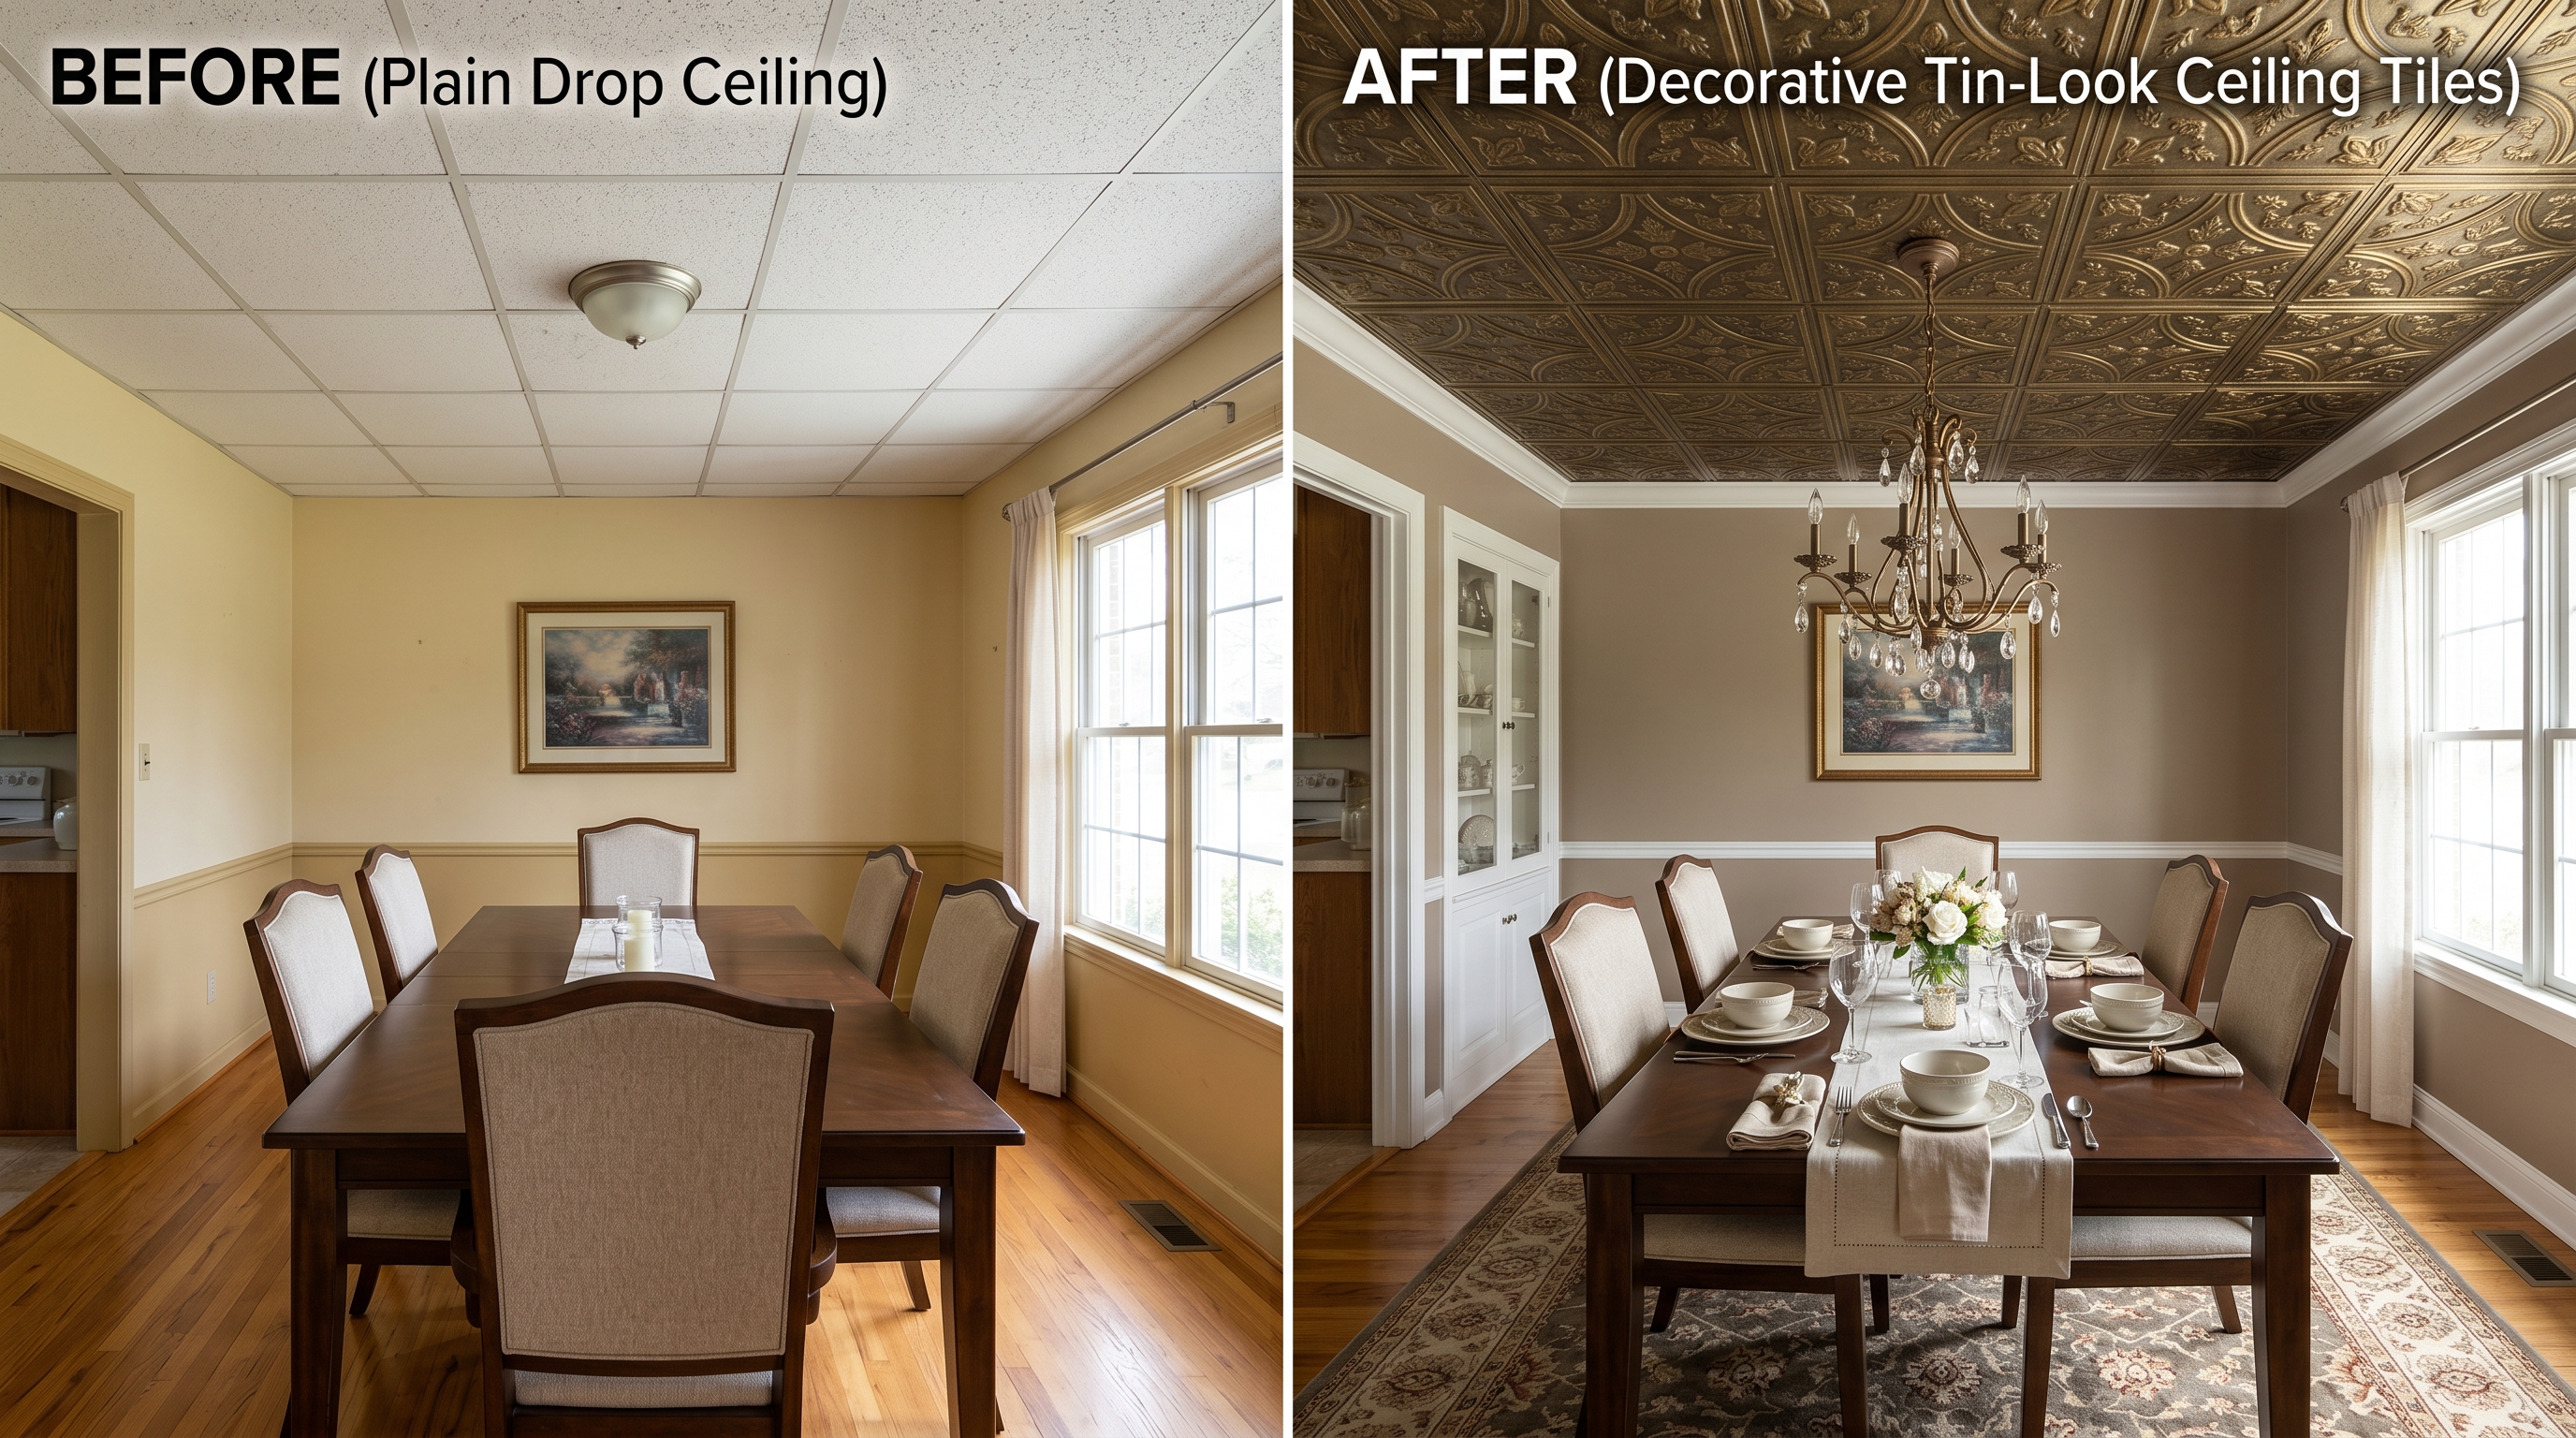
Drop ceiling grids are everywhere in older homes, offices, and commercial spaces – and most of them look it. The suspended T-bar grid with standard white acoustic tiles is functional and cheap, and that is about as far as the compliments go. The question of whether you can install decorative ceiling tiles directly over the existing grid is one we get asked regularly, and the short answer is yes. The longer answer is that it depends on the tile type, the tile weight, and how solidly the grid is hung.
This guide covers when gluing over a drop ceiling grid works, when it does not, which tile materials are suitable, the right adhesive, and the step-by-step process for a result that looks intentional rather than improvised.
When gluing over a drop ceiling grid works
The approach works best when your existing grid is firmly attached with no sagging, the grid runs have no significant rust or visible damage, the grid panel size matches your tile size (the standard 24×24 inch grid accepts 24×24 tiles directly), and you are using lightweight foam or thin PVC tiles rather than heavier materials like stamped tin.
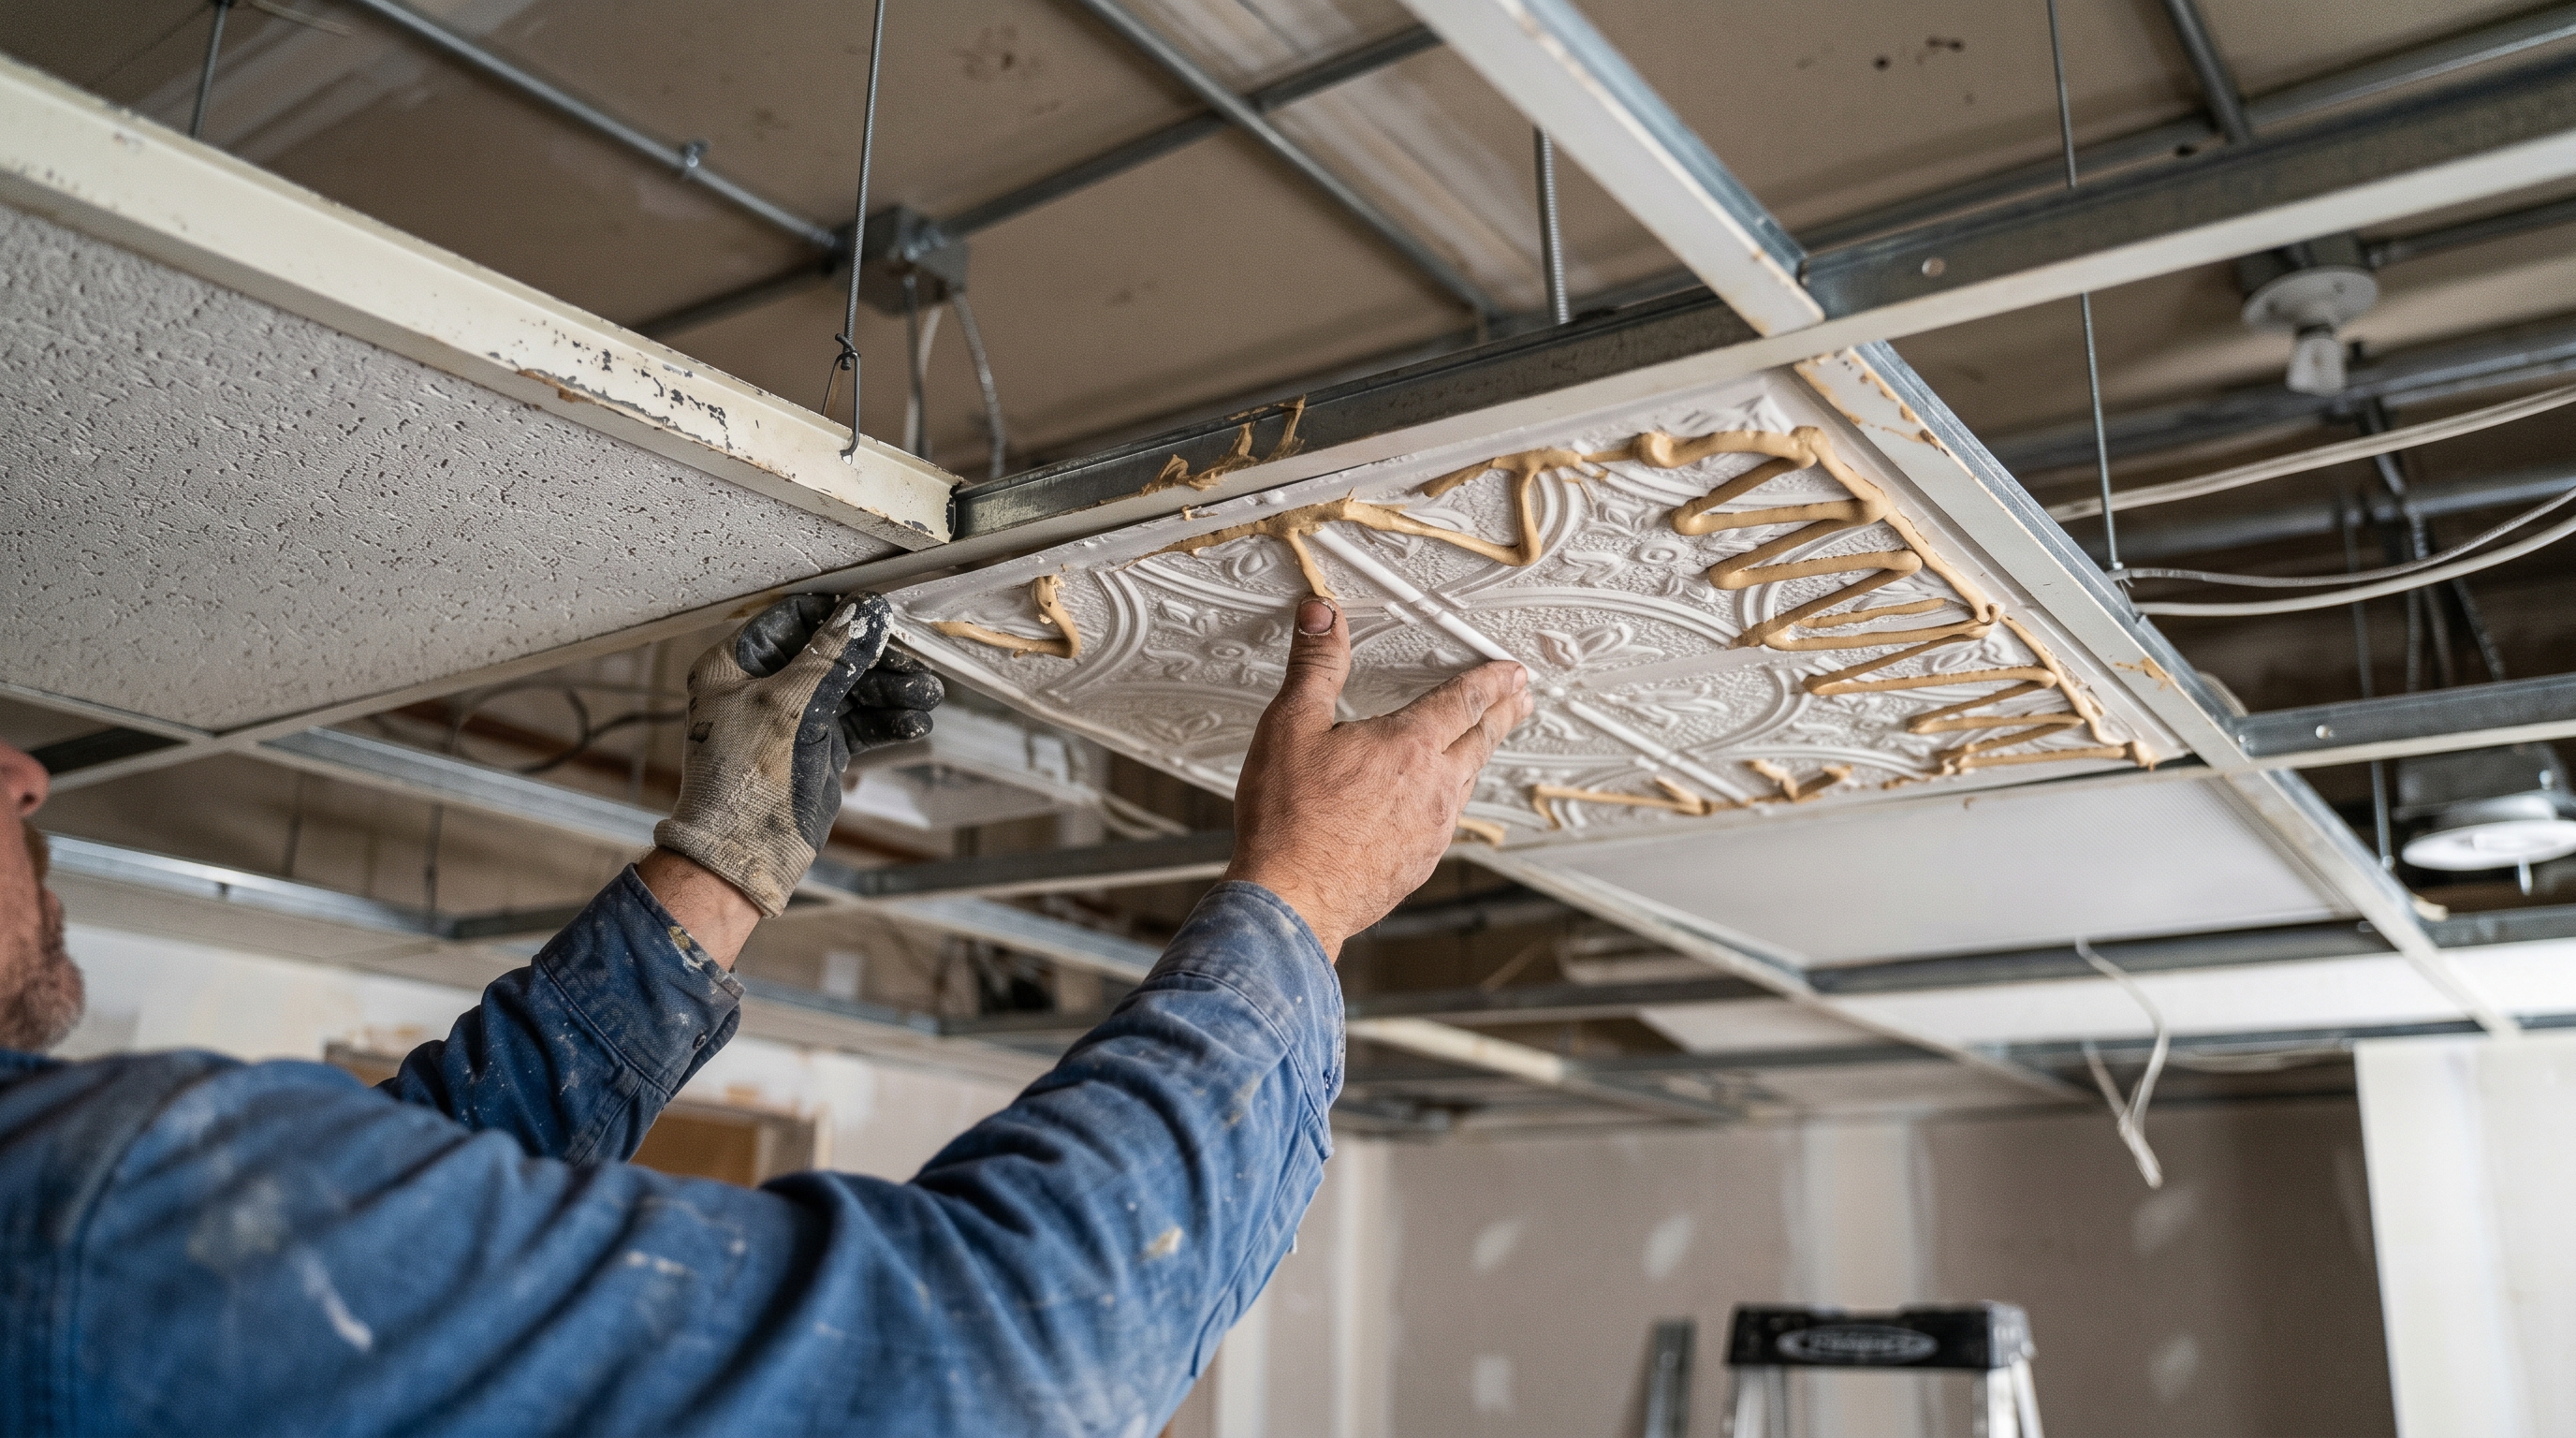
What “gluing over the grid” actually means: the T-bar flanges that hold the existing tiles are still there, but instead of resting tiles in the grid, you apply construction adhesive to the back of decorative tiles and press them down onto the visible grid face, essentially covering the old white tiles and the grid at the same time. The decorative tile sits on top of the existing ceiling system, adding perhaps 5-8mm of height loss.
When it does not work
Do not glue over a sagging or damaged grid. If the existing tiles are sitting in a grid that has any visible sag, flex, or rusting, the adhesive installation will fail eventually as the substrate continues to move. Repair the grid or replace it first.
Heavy tiles are not suitable for glue-over installation. Stamped steel tin tiles at 2.5-4 kg per square metre require secure mechanical fastening into something structural, not adhesive contact with a floating T-bar flange. For tin tiles over a drop ceiling, you need to either use the grid as a drop system (replacing the acoustic tiles with tin tiles set in the grid the standard way) or furring strips back to the joists above the grid.
Size mismatch is also a stopper. If your existing grid is 24×48 inch panels and your tiles are 24×24 inch, you will have visible grid lines between paired tiles. Some homeowners find this acceptable; others find it looks wrong. Measure your grid panel size and confirm tile compatibility before buying.
💬 People Often Ask
Do I need to remove the existing acoustic tiles before gluing new decorative tiles? Not necessarily – you can glue directly over the existing acoustic tiles if they are flat, undamaged, and firmly in the grid. The extra layer adds minimal height loss. However, removing the old tiles first lets you inspect the grid condition more thoroughly and gives a cleaner starting surface.
Best ceiling tile materials for glue-over-grid installation
Foam (EPS) tiles
The lightest and easiest option. Foam tiles at 0.3-0.5 kg per square metre adhere well to acoustic tile surfaces with standard construction adhesive, and the low weight puts minimal stress on the existing grid. The limitation is durability – foam tiles dent and mark more easily than PVC. Best for: dry rooms where aesthetics are the goal and the ceiling will not be touched once installed.
PVC tiles
The recommended choice for most glue-over-grid applications. PVC ceiling tiles at 0.8-1.2 kg per square metre are light enough to adhere reliably to the existing surface, durable enough to last the life of the renovation, and available in faux tin and decorative patterns that create a genuinely attractive finished ceiling. PVC also tolerates the cleaning products used on commercial ceilings much better than foam.
Step-by-step installation over a drop ceiling grid
- Inspect and clean the grid. Check for sag, rust, or loose hanging wire. Tighten any loose hanger wires before proceeding. Clean the grid surface and existing tiles with a dry cloth to remove dust.
- Measure and plan the layout. Start from the center of the room for the most balanced appearance, especially if any partial tiles will be needed at the walls.
- Dry-fit a section before gluing. Set the first 4-6 tiles in position without adhesive to confirm fit and appearance. Check alignment at the grid seams.
- Apply construction adhesive. Use a zigzag pattern of adhesive on the back of the tile, avoiding the edges (which may squeeze out and be visible). For PVC tiles, use an adhesive rated for PVC compatibility.
- Press and hold each tile. Press firmly for 30-60 seconds per tile. Use painter’s tape to hold tiles in position for 2-4 hours while adhesive sets if needed.
- Trim edge tiles. Use a utility knife and straightedge for straight cuts. A jigsaw handles curved cuts around fixtures.
- Install edge trim or cove molding at the wall junction to give the ceiling a finished perimeter.
- Allow full cure time. Most construction adhesives reach full strength in 24-72 hours. Avoid impact or contact with the ceiling during this period.
Disclaimer: Recommendations in this article are general guidance only. Confirm product specifications, structural suitability, and installation requirements with a qualified professional before purchase or installation. Talissa Decor is not liable for outcomes based on this content.
Free Download: Quick Reference Guide
Gluing Ceiling Tiles Over Drop Ceiling – Step-by-Step Guide
Download PDF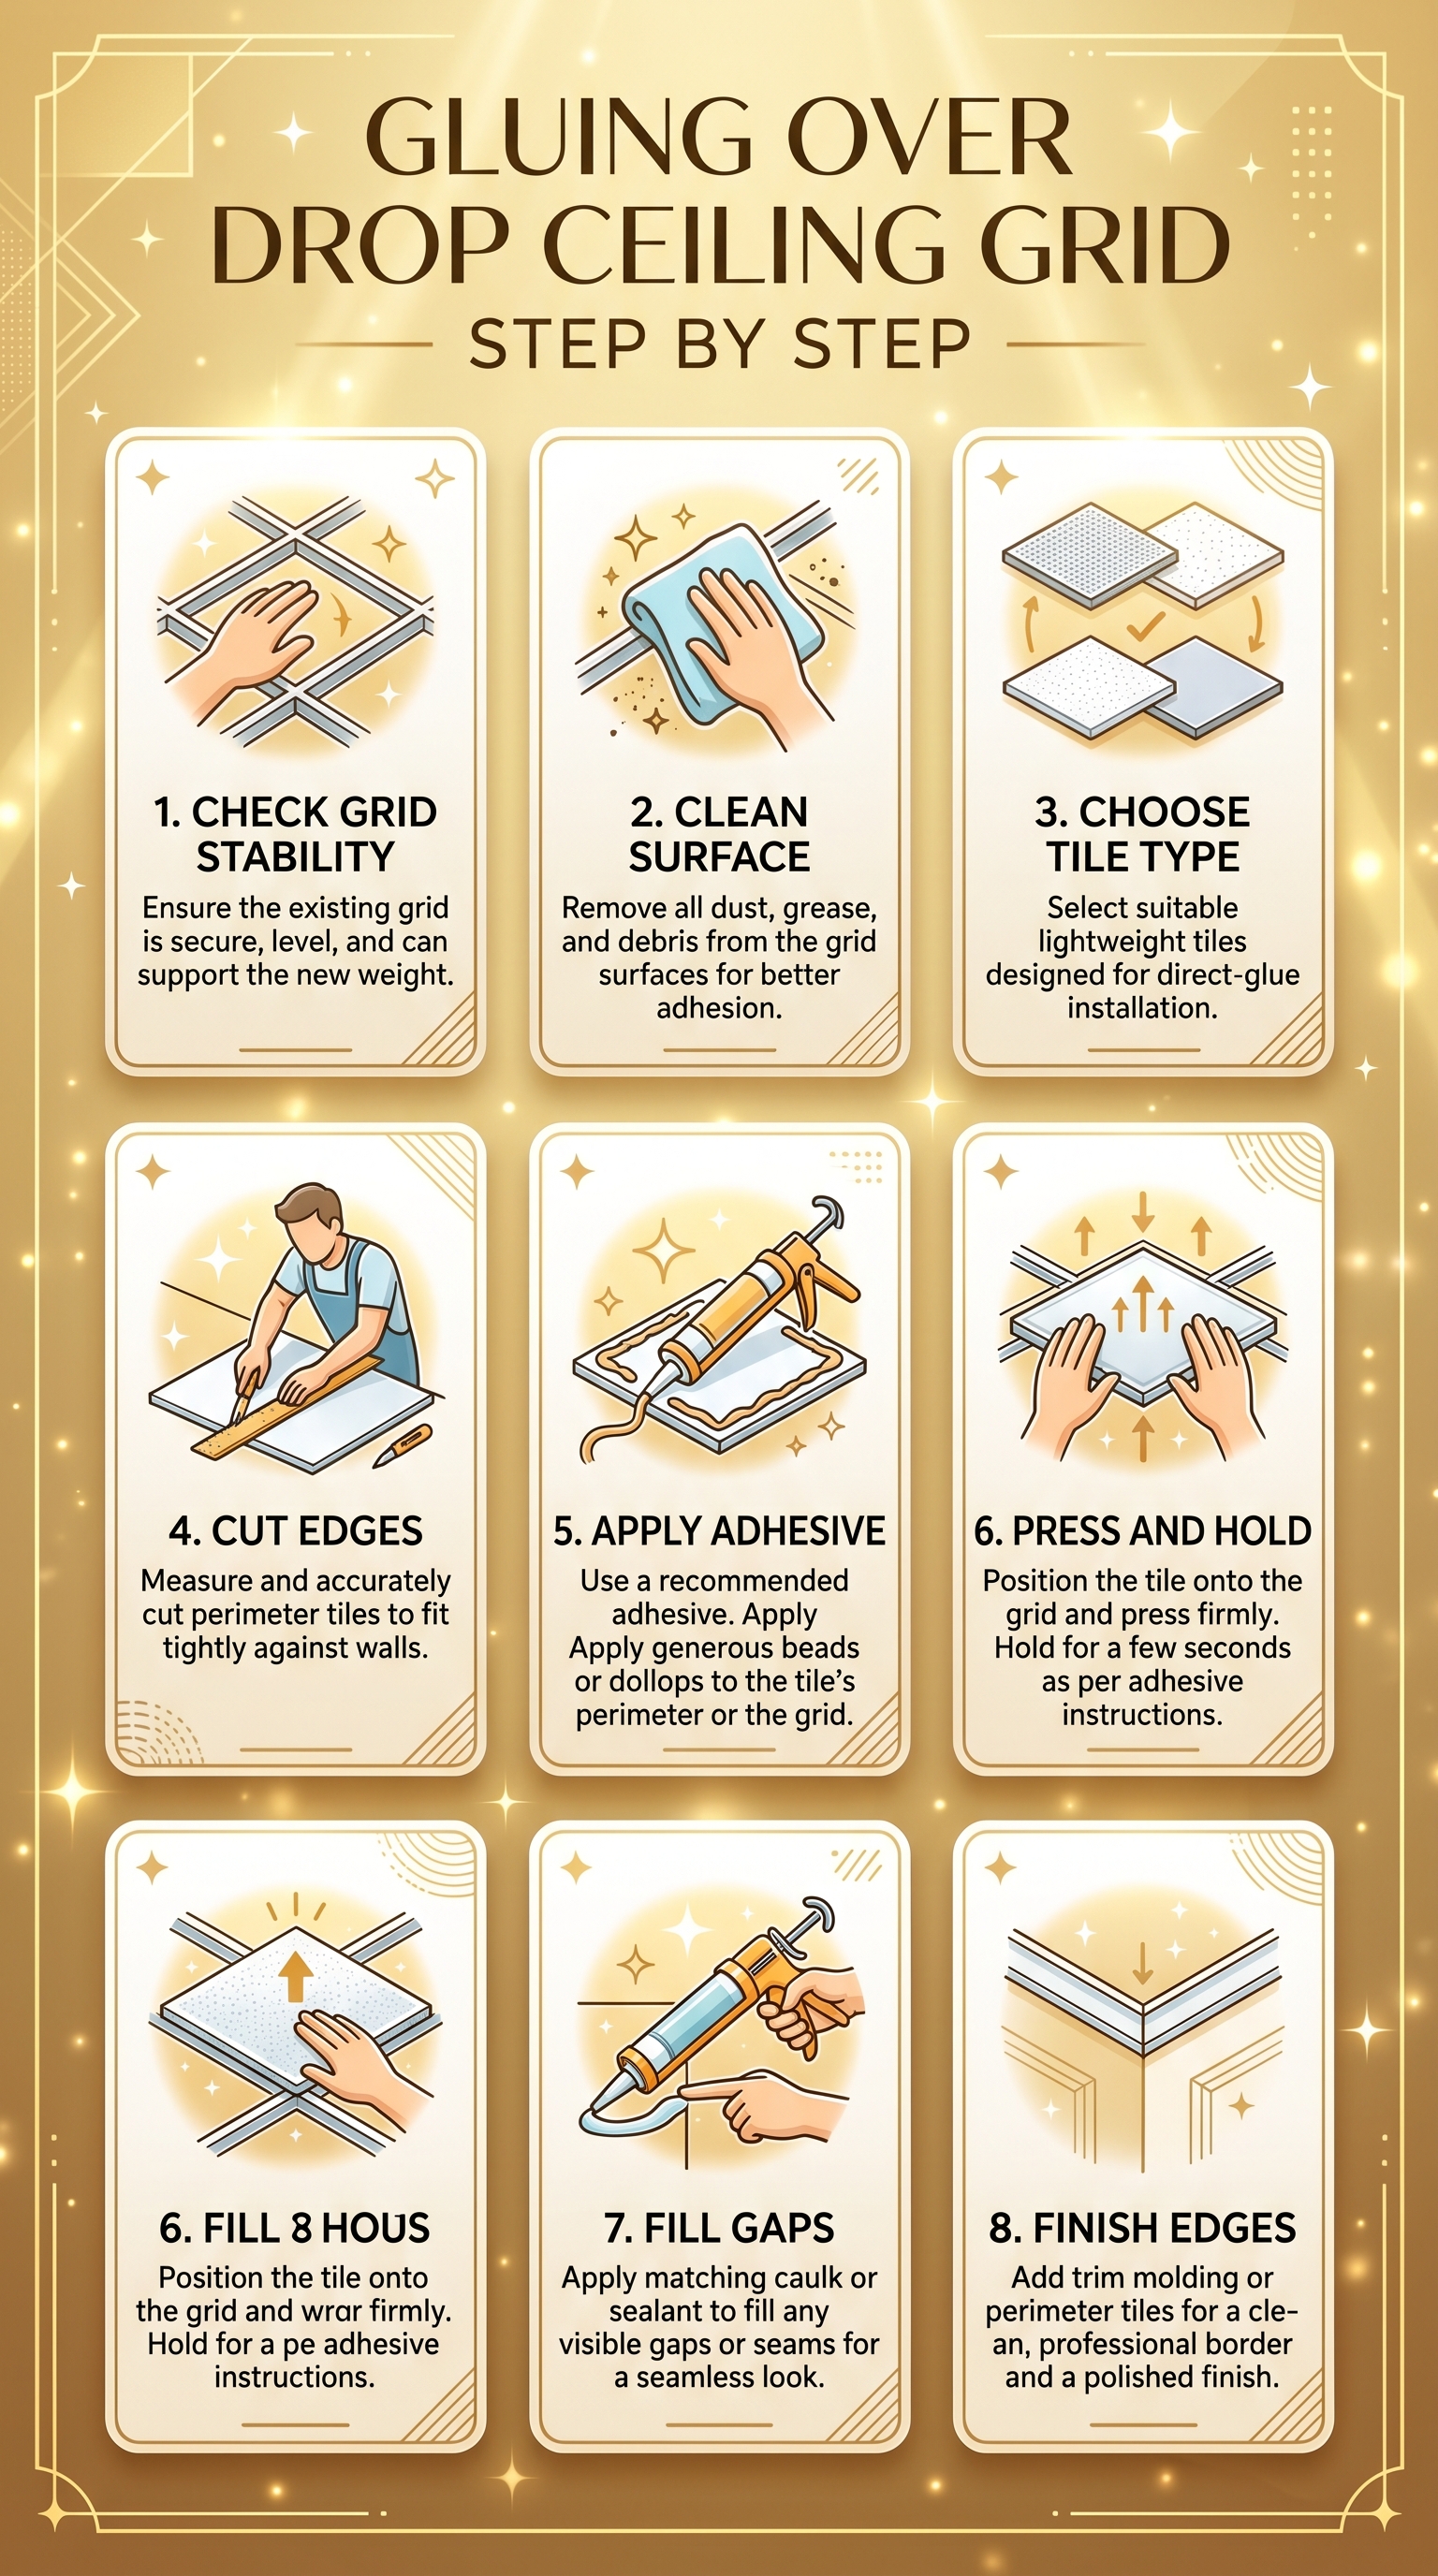
Sources and references
- The Home Depot – Ceiling Tile Installation Guides and Resources
- BuildingGreen – Drop Ceiling Tile Material Ratings and Reviews
Keep reading
Talissa Decor’s ceiling tile collection includes PVC and foam options designed for drop ceiling grid installation. Order samples before committing to verify the finish in your actual lighting conditions.

Written by
Margaret K.
Home renovation writer with 11 years covering interior design and DIY decor projects
Margaret has spent over a decade writing about home renovation and interior design for Canadian homeowners. She specializes in ceiling and wall treatments, with a particular focus on DIY-friendly solutions that transform spaces without major construction. Her work has appeared in home decor blogs and renovation guides across North America.