


Vaulted ceilings are a beautiful architectural element that create room and openness in a cottage. Sometimes, however, they also make a room appear somewhat sparse or uninteresting. That’s where faux wood beams come in. These light, easy-to-install beams allow you to have the beauty and character of actual wood without the expense and installation headache. Faux wood beams can easily change your space whether you want a rustic, contemporary, or traditional cottage appearance.
Why Choose Faux Wood Beams?
Faux wood beams aren’t just a budget-friendly alternative to real wood – they offer a range of benefits that make them an excellent choice for vaulted ceilings in cottages.
-
Lightweight and Easy to Install – Unlike real wood, which can be heavy and require structural reinforcement, faux wood beams are made from high-density polyurethane. This makes them much easier to handle and install.
-
Cost-Effective – Real wood beams can be expensive, especially when factoring in material and installation costs. Faux wood beams offer the same aesthetic at a fraction of the price.
-
Authentic Appearance – High-quality faux beams are designed to mimic the look of natural wood, with realistic wood grain and texture.
-
Durable and Low Maintenance – Unlike real wood, faux wood beams won’t warp, crack, or attract pests over time. They require little to no maintenance.
-
Versatile Design Options – Faux beams come in a variety of finishes, colours, and styles, making it easy to match them to your cottage’s decor.
Ways to Use Faux Wood Beams in Your Cottage
There are several creative ways to use faux wood beams to elevate the look of your vaulted ceilings. Here are some ideas:
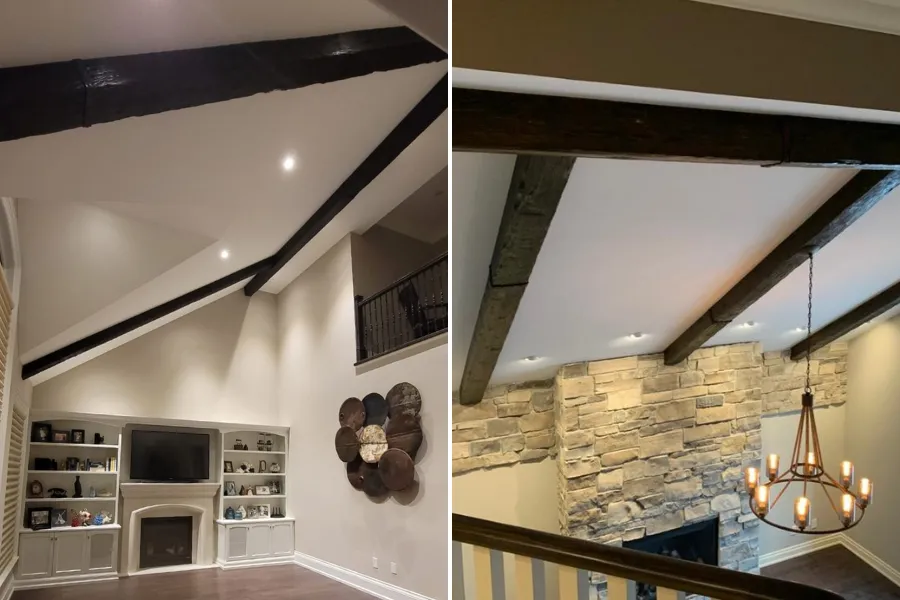
1. Single Accent Beam
If you have a simple vaulted ceiling and wish to introduce subtle personality, one faux wood beam running across the ceiling’s top can introduce warmth and a cozy ambiance.
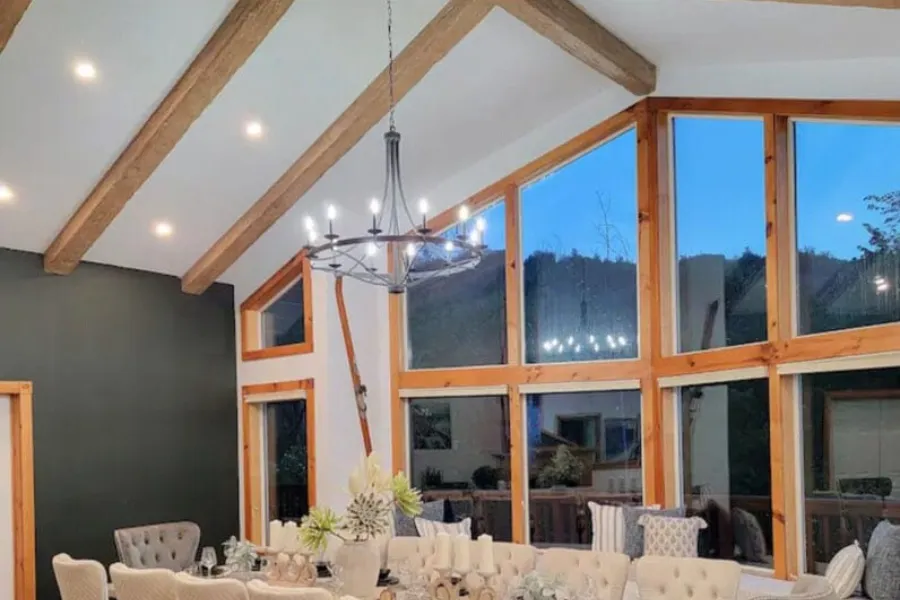
2. Parallel Beam Layout
For a more dramatic look, install multiple beams parallel to each other. This adds depth and dimension to your ceiling while enhancing the cottage’s rustic charm.
3. Cross-Beam or Grid Pattern
If you want to create a coffered ceiling effect, you can utilize faux beams in a crosshatch pattern. This design is appropriate for larger cottages and adds a sense of architectural elegance.
4. Framing Doorways and Openings
Faux wood beams aren’t just for ceilings – they can also be used to frame doorways and openings between rooms for a more coherent and structured look for your cottage.
Custom Painted Faux Wood Beams
At Talissa Decor, we also offer custom-painted faux wood beams, allowing you to choose a finish that suits your individual taste for your cottage. Whether you prefer a deep, dark stain or a distressed, whitewashed appearance, our large selection of custom paint finishes guarantees that you will discover the ideal style. See a few of our available options below.

Choosing the Right Faux Wood Beams for Your Cottage
With so many styles available, selecting the right faux wood beams is key to achieving the look you want. Consider these factors:
-
Colour & Finish – Darker beams offer a dramatic contrast, making them ideal for a white vaulted ceiling accented by dark wood beams. Lighter, weathered finishes create a softer, more natural look.
-
Size & Proportion – Choose a beam size that complements your ceiling height and room dimensions.
-
Style – From rough-hewn, reclaimed rustic wood beams to sleek and modern designs, pick a beam style that matches your cottage aesthetic.
How to Install Faux Wood Beams
Step 1: Preparation
The first thing you will need to do is determine how many beams you need for the vaulted ceiling and figure out how they will be spaced out. When planning the layout of your beams, make sure you decide on an amount of beams and precise spacing that doesn’t create a cramped look on the ceiling. Basically, don’t try to use too many beams – but make sure you use enough so the space looks filled and not too empty.
Once you have your new faux wood beams and are ready to install them in your cottage, it is time to prepare for the installation. Make sure you gather all the tools needed for the installation! You will need wooden blocks (cut to match the inner width of your selected beam), measuring tape & pencil, fine-tooth hand saw or a miter saw, nail gun or drill, screws or finishing nails, and construction adhesive.
Step 2: Install the Wooden Blocks
Cut the wooden blocks from 2×4 or 2×6 scraps, and use one block for every 2.5′ to 3′ of beam length. Mark the centerline of the beam on the ceiling using a chalk line or laser level. Secure the blocks along the centerline with screws every 3′. If there’s no stud behind a block, use drywall anchors for added support.
Step 3: Apply the Adhesive
Spread the construction adhesive along the beam edges that will touch the ceiling. Apply the adhesive away from the outer edge of the beam to prevent excess glue from oozing out.
Step 4: Position and Secure the Beam
Place the beam over the installed blocks and press it firmly against the ceiling. Fasten the beam in place using either screws or finishing nails. Use screws that blend with your beam’s finish, such as black screws for dark beams. If you’re installing beams side by side, you can use decorative straps to conceal the joints for a seamless look.
Elevate Your Cottage with Ease
Decorative ceiling beams are a simple yet valuable addition to the vaulted ceilings of a cottage. They bring warmth, texture, and long-lasting aesthetic appeal without the complications of actual wood. Whether the desire is to achieve a cozy cabin atmosphere or a modern farmhouse style, these beams provide a cost-effective and fashionable option.
Ready to upgrade your space? Get in touch or explore Talissa Decor’s collection of faux wood beams and start transforming your cottage today!

Written by
James O.
DIY home improvement writer with 9 years covering building materials and finishing products
James covers practical home improvement topics for weekend renovators and first-time homeowners. He focuses on material comparisons, installation guides, and cost-benefit analysis to help readers make confident purchasing decisions. He has hands-on experience with most major ceiling and wall panel product categories.