

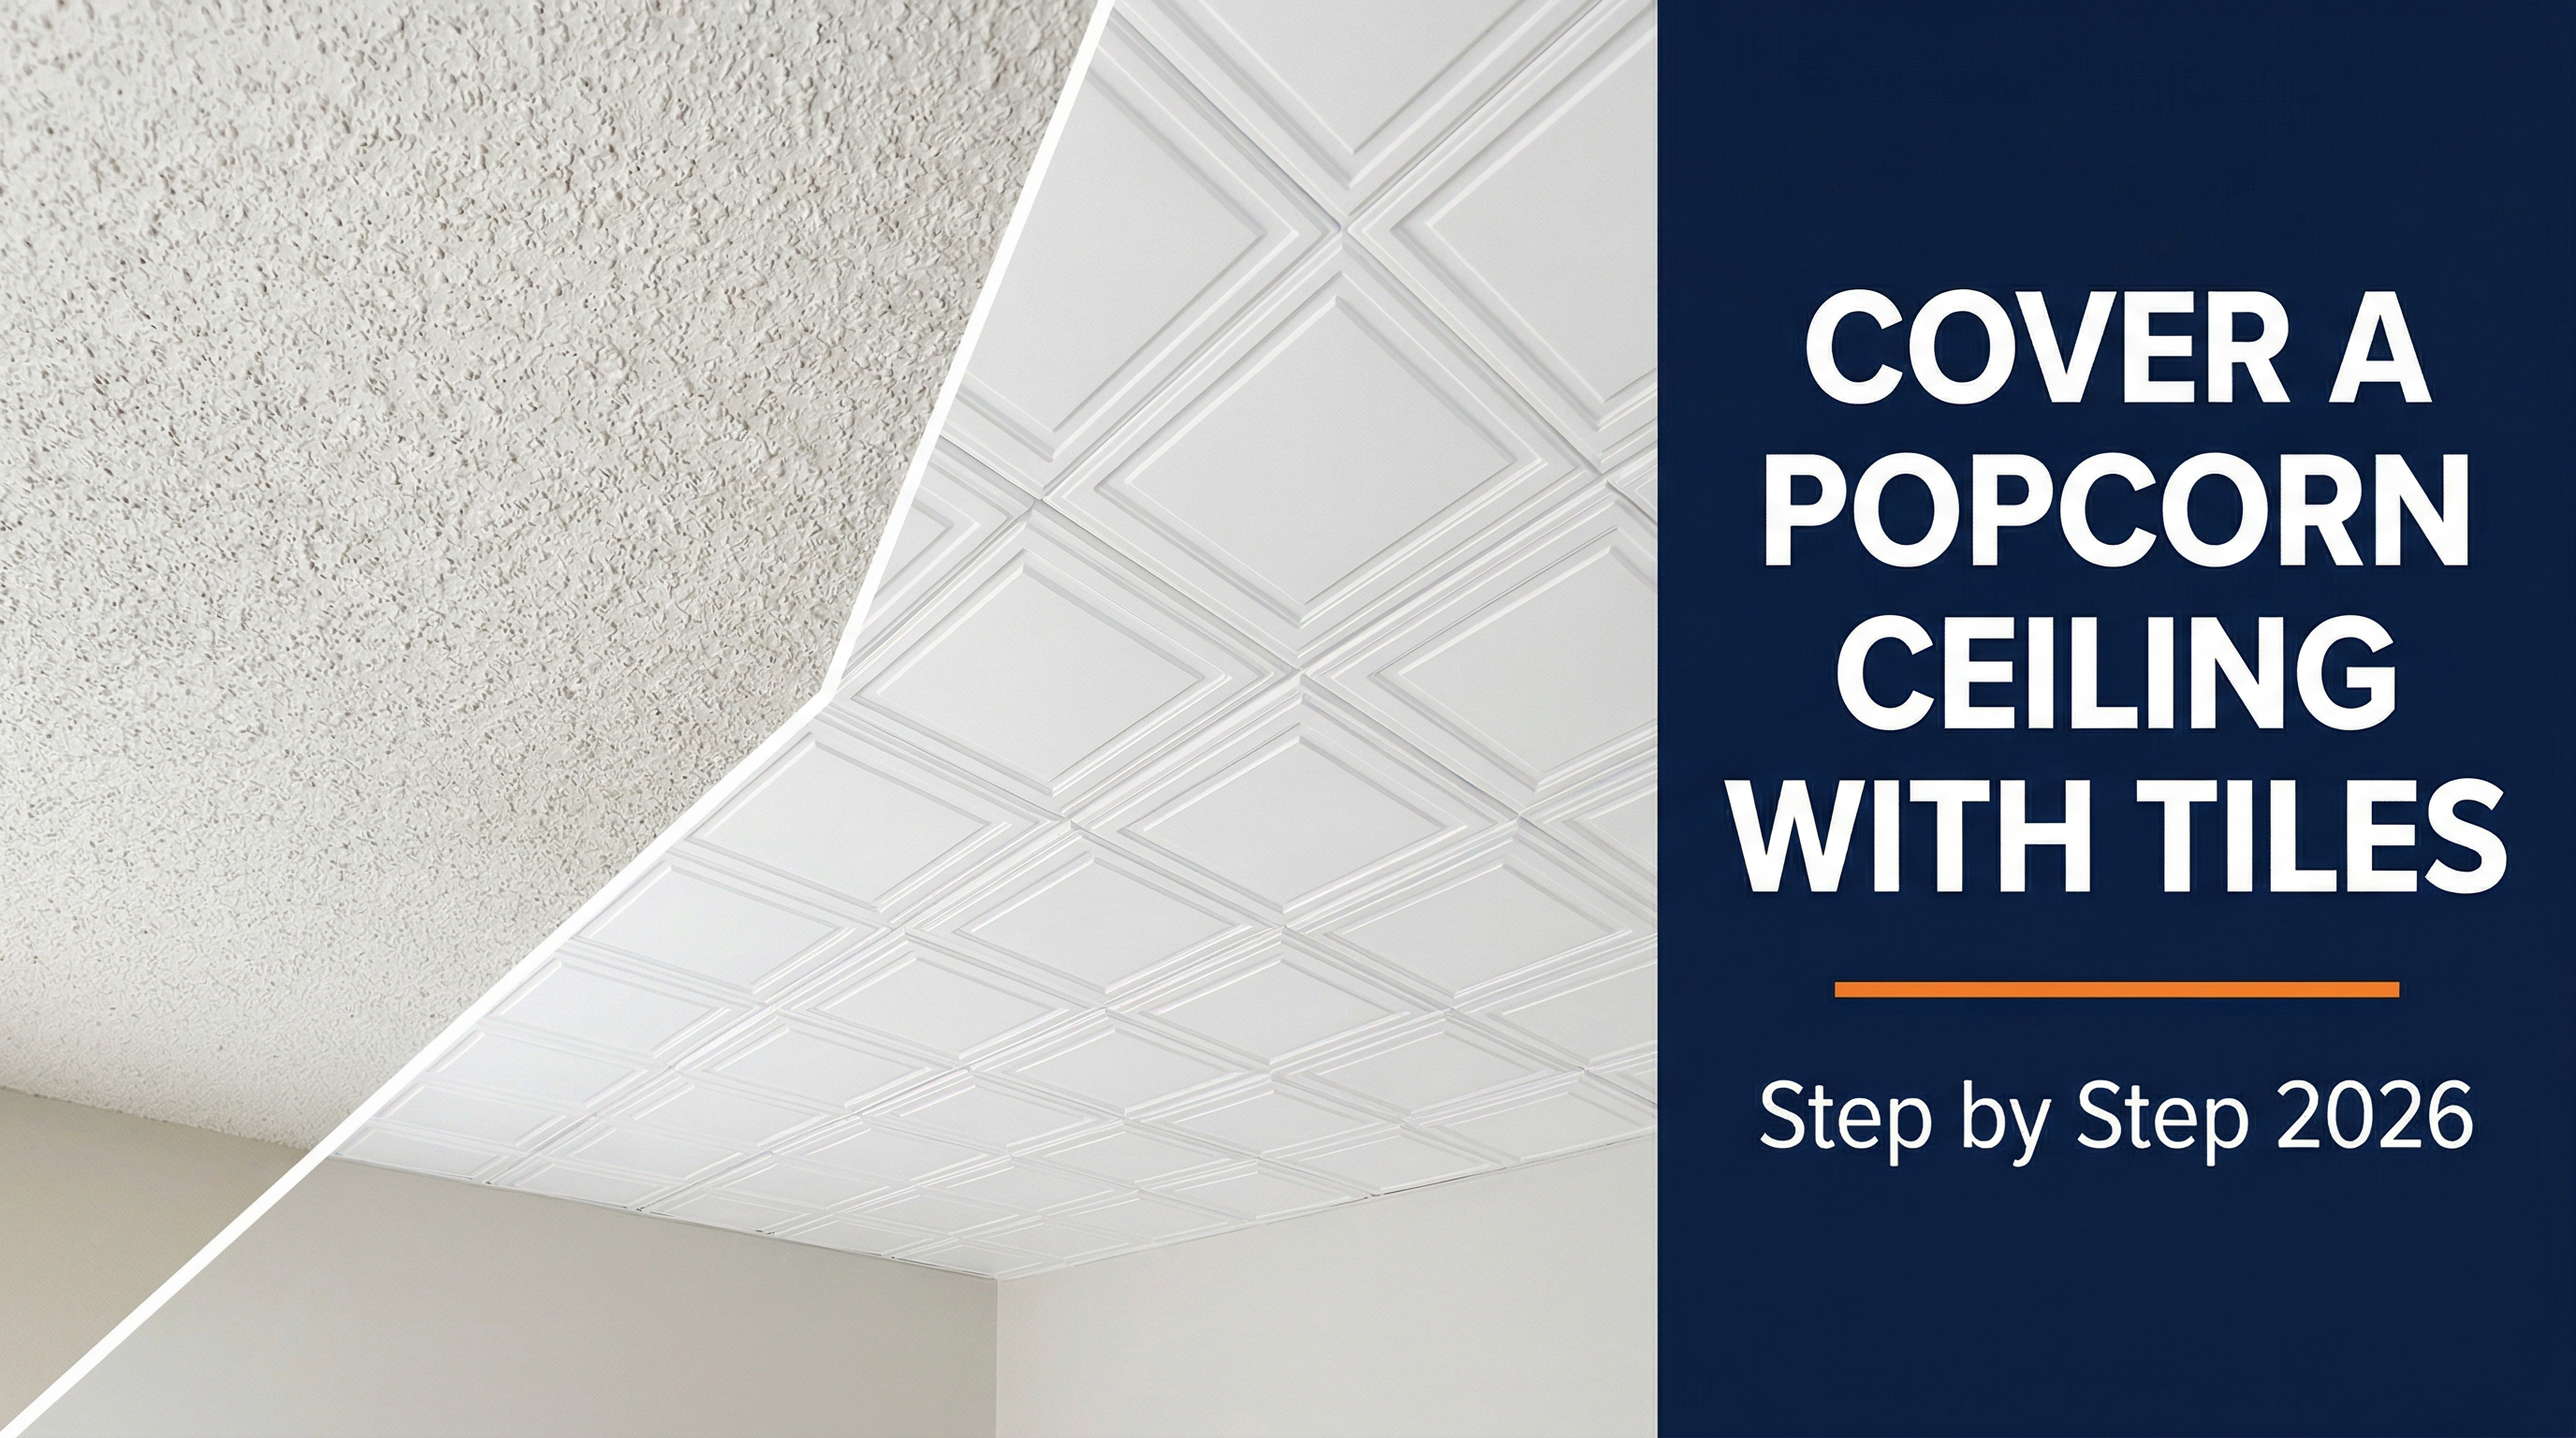
Popcorn ceilings were the dominant ceiling finish in U.S. residential construction from the late 1950s through the early 1990s. They look dated, they collect dust, they are brutal to repaint, and the texture itself can hide cracks. Removing the popcorn is a miserable job that involves scraping wet drywall mud across your face for an entire weekend. Covering it with decorative tiles is the much smarter alternative, and the result looks better than a flat ceiling ever did.
The best way to cover a popcorn ceiling without the mess of scraping is by installing glue-up decorative ceiling tiles. The process simply involves vacuuming the ceiling to remove dust, mapping out a centered layout, applying construction adhesive to the back of each tile, and pressing them directly over the existing texture for a professional finish.
This is the step by step process we walk customers through every week, from a fresh batch of glue up ceiling tiles to a finished room.
On this page
Why cover instead of scrape
Scraping a popcorn ceiling means soaking the entire ceiling with water, waiting fifteen minutes, then dragging a wide putty knife across every square inch while wet drywall mud rains down on you. After the scrape you still have to skim coat, sand, prime, and paint the now exposed drywall. It is a four day job for a single room and the dust gets into everything.
Covering the popcorn with glue up tiles is a half day job. You skip the scraping, the skim coat, the sanding, and most of the dust. The finished ceiling looks better than a flat repainted one because you get crisp decorative relief instead of a smooth blank surface. The popcorn texture is permanently sealed under the tiles, which also means you eliminate the asbestos disturbance risk if your home is older.
Tools and materials
- Decorative ceiling tiles, 20 by 20 or 24 by 24 inch (order 10 percent extra for cuts and waste)
- Construction adhesive in 10 ounce tubes (one tube covers roughly 8 to 10 tiles)
- Caulking gun
- Sharp utility knife with extra blades (for styrofoam) or fine tooth saw (for PVC)
- Cordless drill with a small bit (for the medallion install if you are doing a fixture)
- Step ladder rated for your weight
- Chalk line and tape measure
- Pencil
- White flexible caulk (latex, paintable)
- Crown moulding or simple cove trim for the perimeter (optional but recommended)
- Safety glasses and an N95 mask
Preparing the ceiling
The ceiling needs to be dry, dust free, and structurally sound before you put any adhesive on it. Take an hour to do this right.
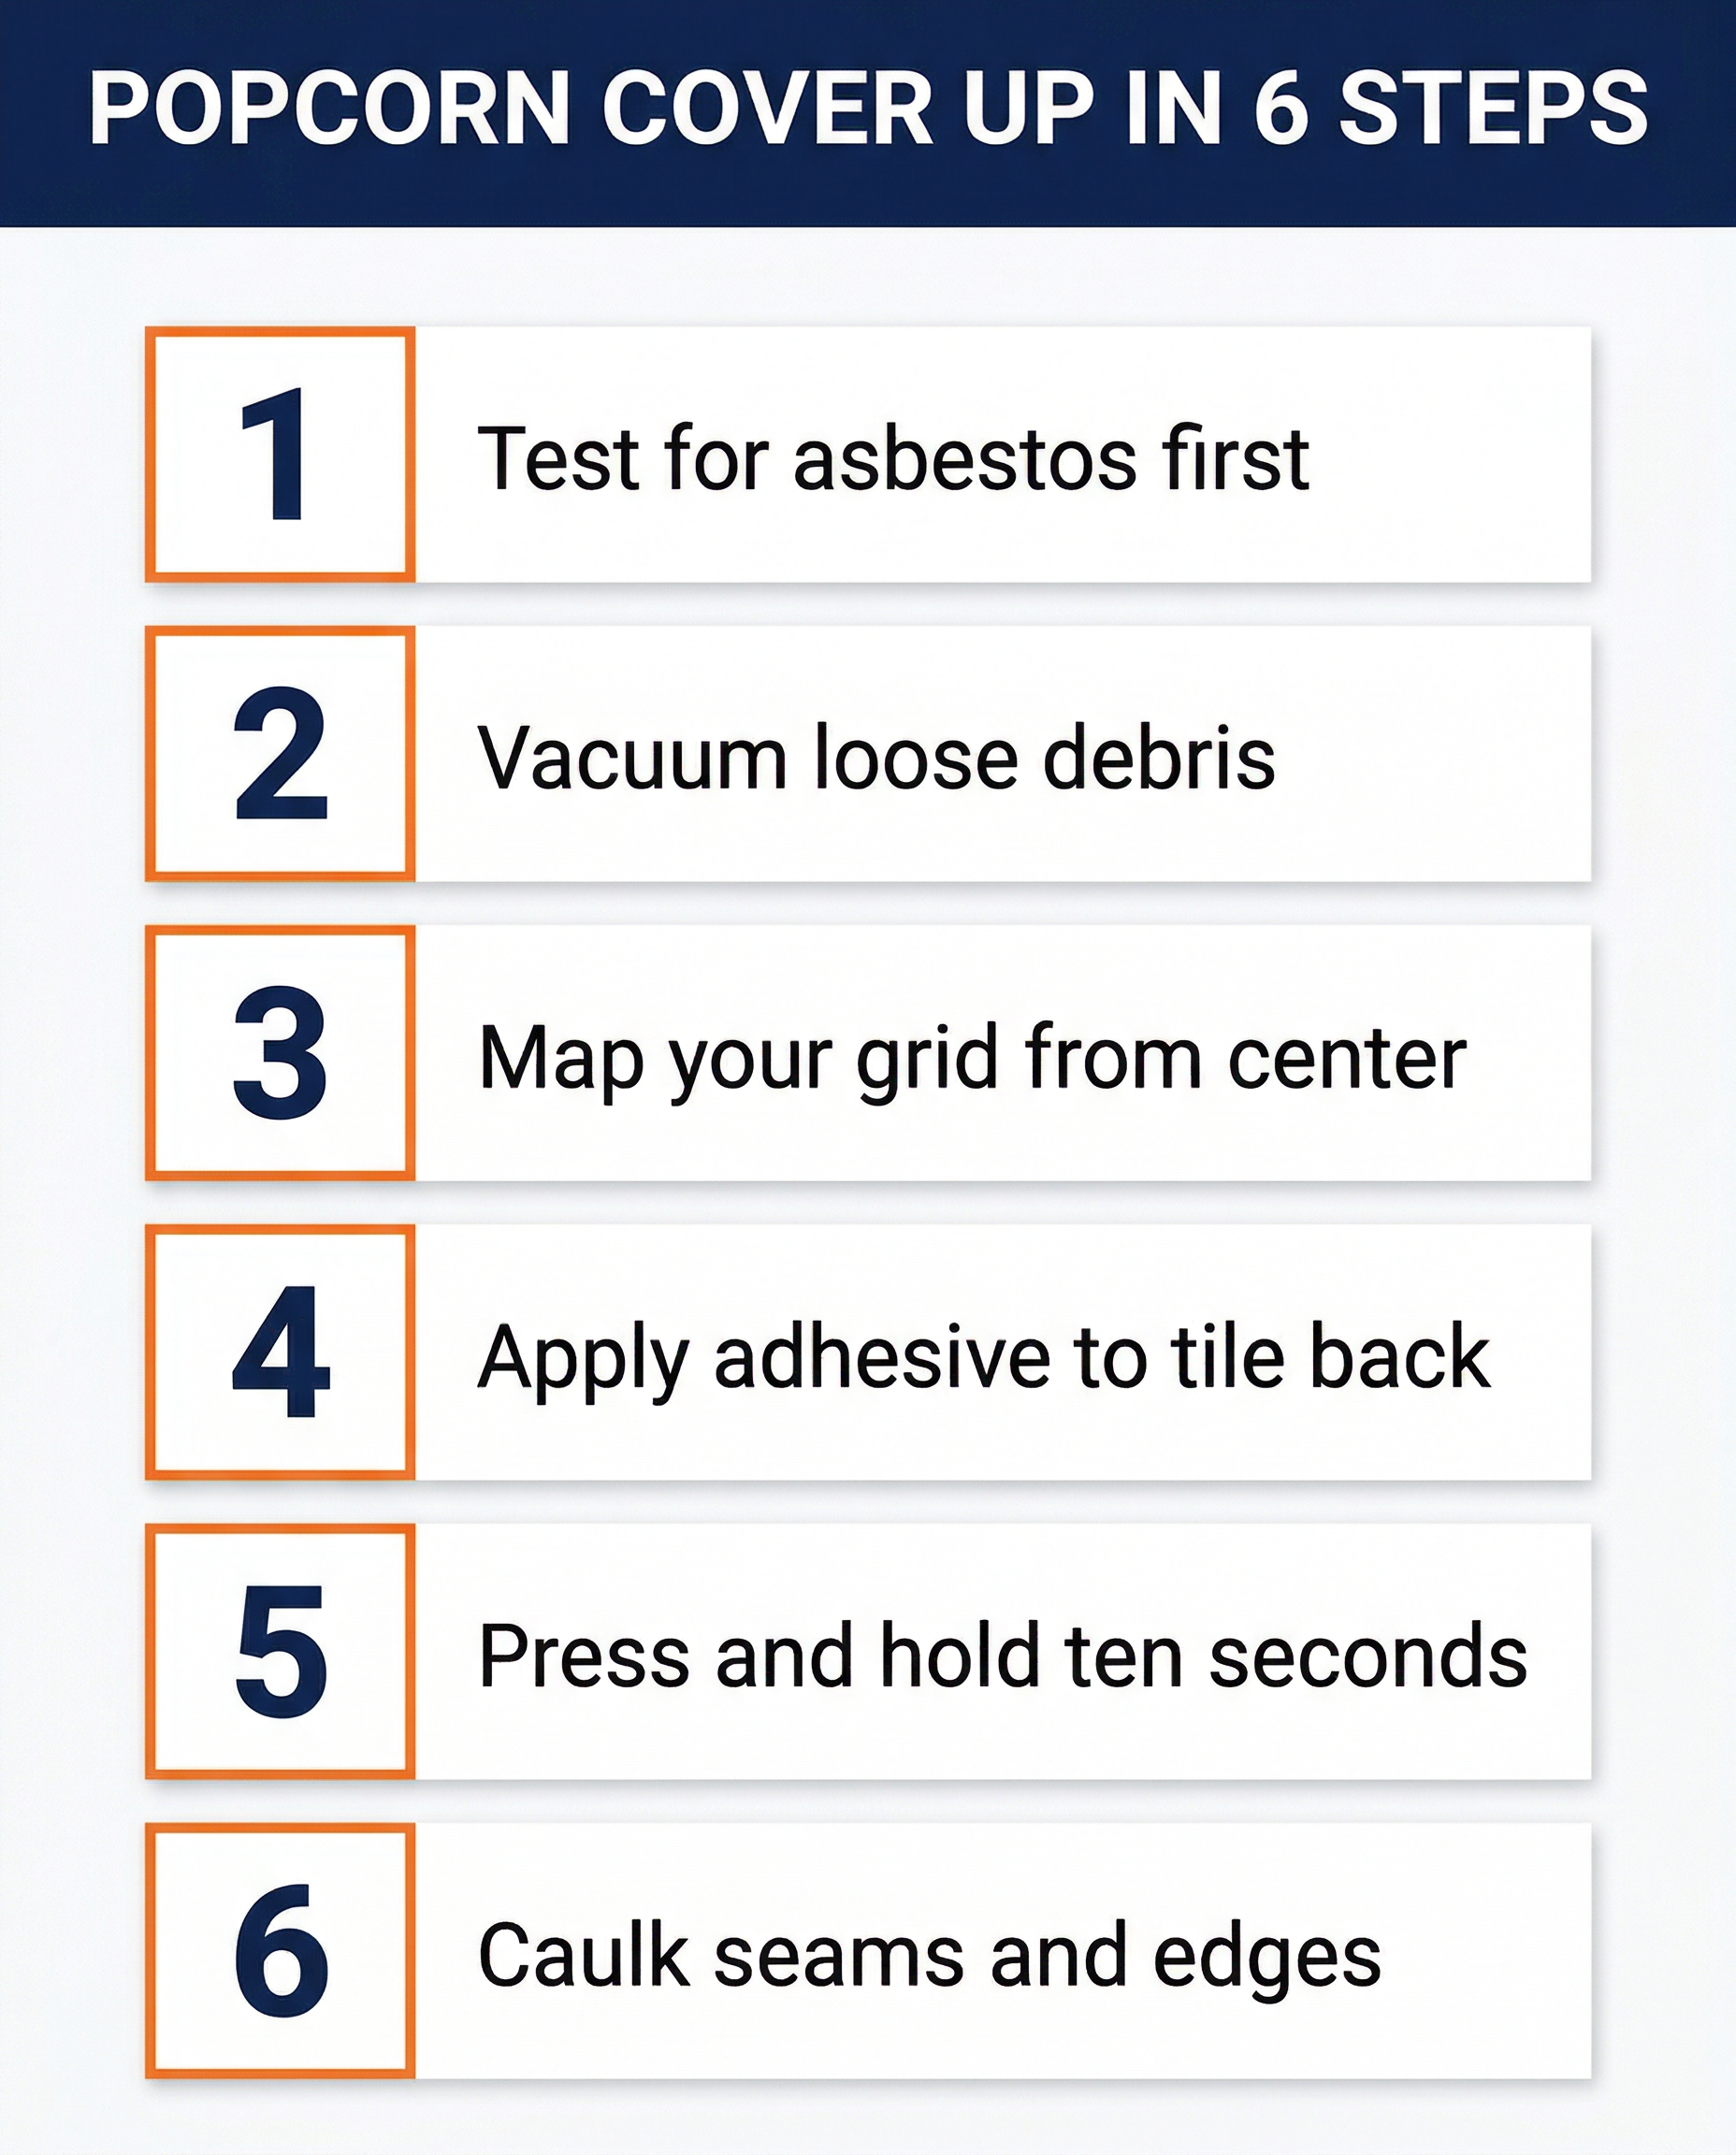
- Vacuum the entire ceiling. Use a soft brush attachment and run it slowly across the popcorn texture to lift loose particles. Mist with water as you go if your ceiling is very dusty (this also reduces airborne fibers).
- Look for loose chunks. Lightly tap the ceiling with the back of a putty knife in a few places. If popcorn flakes off easily in large pieces, those areas need to be scraped down to bare drywall before you tile, or your tiles will fall with the popcorn.
- Patch any cracks or holes. Use a quick setting drywall patch or spackle and let it dry fully.
- Wipe the perimeter where the ceiling meets the wall with a damp cloth so the caulk line at the end will adhere cleanly.
Mapping your tile layout
This step is what separates a professional looking install from a frustrating one. You want full tiles in the most visible part of the room and partial tiles tucked along the least visible edges.
- Find the center of the room. Measure each wall and mark the midpoint, then snap a chalk line from the midpoint of one wall to the midpoint of the opposite wall. Repeat for the other pair of walls. The two chalk lines cross at the room’s true center.
- Dry fit four tiles at the center, with each tile in one quadrant of the cross. Step back and look at how the perimeter cuts will land.
- Adjust if needed. If your perimeter cuts will leave a tiny sliver (less than four inches) on one wall, slide the entire grid over by half a tile. A four inch cut looks fine; a one inch sliver looks broken.
- Mark your starting line. Once you are happy with the layout, snap a chalk line along one full edge of your starting tile. This is the reference for every tile that follows.

Installing the tiles
Now the easy part. Once you have done two or three tiles you will move quickly.
- Start at the center and work outward in a spiral or row pattern. Working from the center keeps the grid straight and gives you matching cuts on opposite walls.
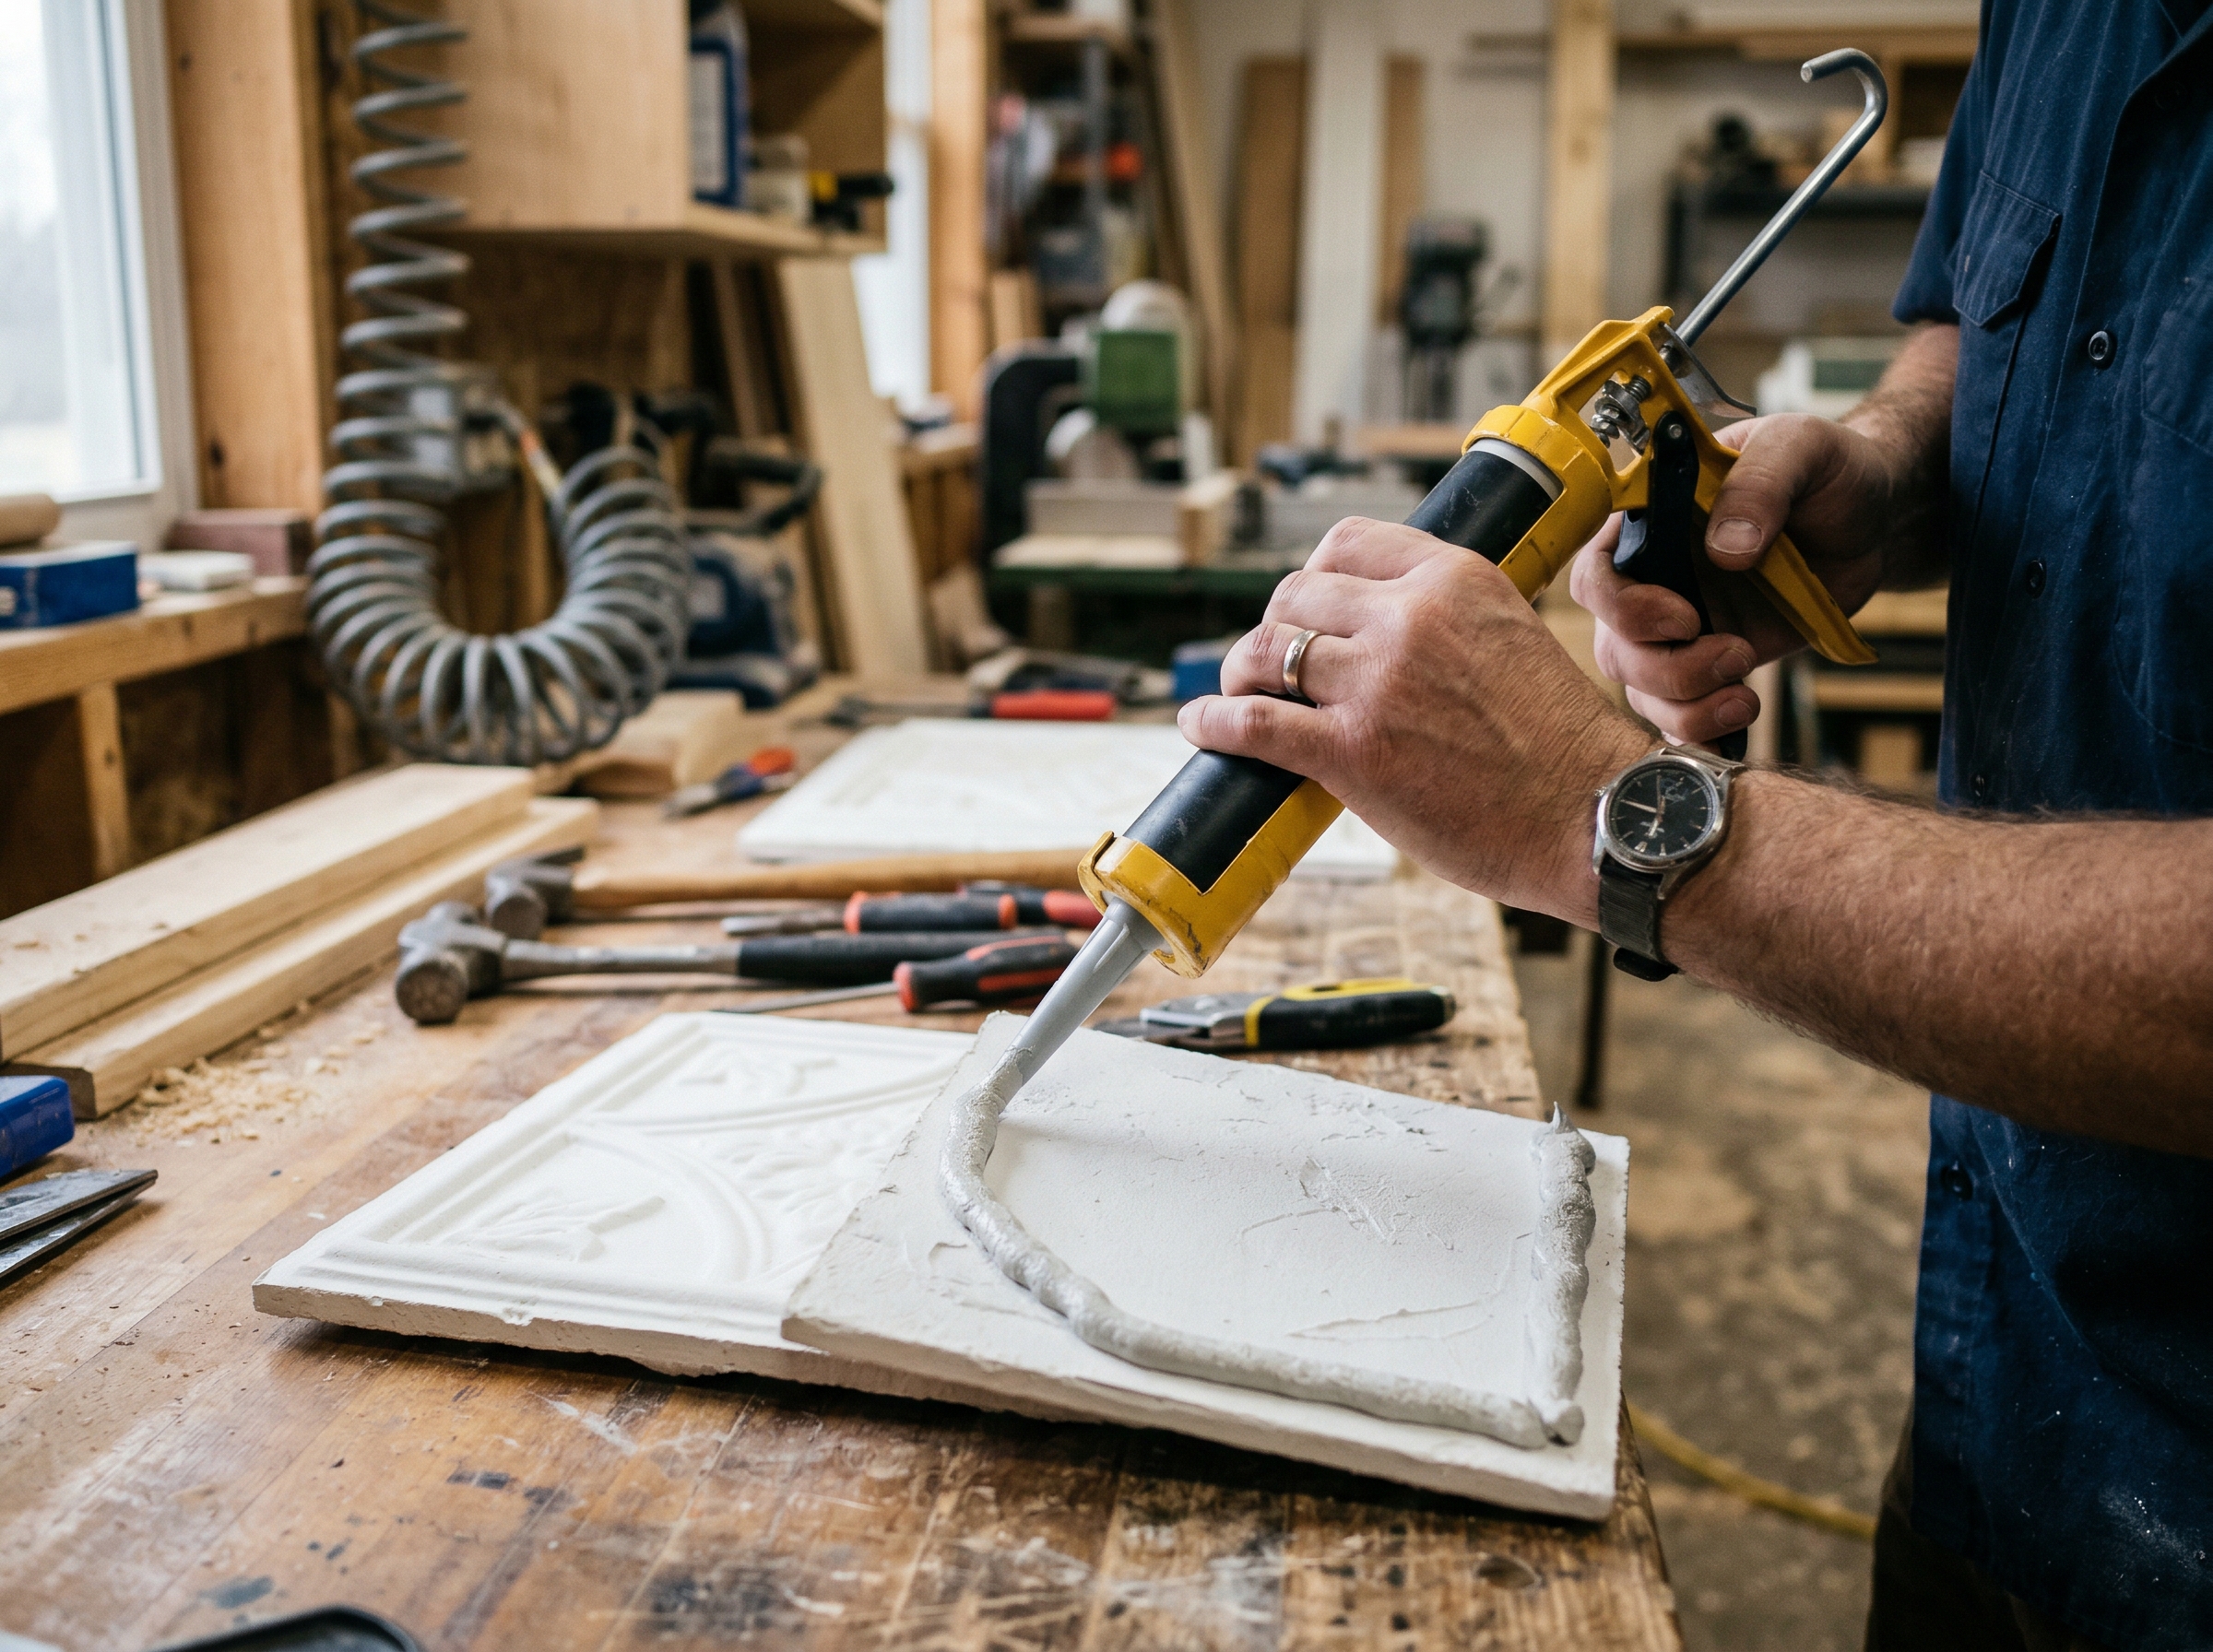
- Apply adhesive. Run a continuous bead around the perimeter of the back of the tile, about half an inch in from the edge. Add a single X across the center for tiles larger than 20 inches. Do not use too much glue or it will squeeze out the seams.
- Press the tile up against the ceiling along the chalk line. Hold firmly for ten seconds. Use both hands and apply even pressure across the entire surface so the tile keys into the popcorn texture.
- Check the seam with the previous tile before moving on. The two tiles should meet snugly with no visible gap. If there is a gap, push the new tile sideways before the adhesive sets.
- Repeat across the room. Most rooms take an hour or two of actual install time once you are in rhythm.
- Cut perimeter tiles last. When you reach a wall, measure each gap individually because rooms are rarely square. Mark the cut on the back of the tile and trim with a utility knife (for styrofoam) or fine tooth saw (for PVC).
Finishing edges and seams
The last step is what makes the install look professional rather than DIY.
- Caulk the perimeter. Run a thin bead of white flexible caulk along the joint between the outermost tiles and the wall. Smooth it with a wet fingertip. This hides the cut edges and the inevitable small gaps where the wall is not perfectly straight.
- Caulk any visible seams between tiles where you can see a hairline gap. A good install rarely needs this but some rooms are forgiving and some are not.
- Install crown moulding around the perimeter for the cleanest finish. A simple two inch cove is enough to frame the new ceiling and to cover any imperfect cuts at the edges. This is optional but it lifts the project from “good” to “looks like new construction.”
- Touch up paint if you painted the tiles before install. Most decorative tiles ship primed white and look great as is. If you want a different color, paint with latex only and use a foam roller for the smoothest finish.
What our customers say
“Did our 1972 ranch popcorn ceiling with PVC tiles last fall. Took two of us a Saturday afternoon for the whole living room. Best home improvement we have done. Wish I had skipped the popcorn scraping I did in our last house.”
r/HomeImprovement homeowner, 2024
Free download
Save this guide as a one page PDF and keep it handy while you shop or plan your install.
Frequently asked questions
Do I need to scrape any of the popcorn first?
No, in most cases. The texture actually helps the construction adhesive grip. The exception is any area where the popcorn is loose, flaking, or pulling away from the drywall. Scrape those spots down to clean drywall before you install tiles over them, otherwise your tile will eventually fall with the loose popcorn behind it.
What if the room was built before 1980 and the popcorn might contain asbestos?
Test before you start. Collect a small sample with the area lightly misted to control fibers, seal it in a bag, and send it to a certified asbestos lab. Tests cost about thirty to fifty dollars. If the result is positive, you can still cover the ceiling with glue up tiles because the install does not disturb the texture, but you should hire a licensed abatement contractor for any patching, sanding, or hole drilling that exposes the popcorn directly.
How long does the adhesive take to cure?
Construction adhesive sets in about ten minutes and reaches full strength in 24 hours. The tiles will hold themselves up immediately if you apply the adhesive correctly. Avoid running ceiling fans or air conditioning at full blast for the first day after install to give the glue a calm environment to cure.
Can I install ceiling tiles over a textured (knockdown or orange peel) ceiling, not just popcorn?
Yes. Knockdown and orange peel textures are flatter than popcorn and the install is even easier. The same adhesive process works on any of these surfaces.
What about the light fixture, smoke detectors, and vents?
Cut around them. For a light fixture, drop the canopy first, install the surrounding tiles with cut edges that meet at the junction box, then reinstall the canopy (or even better, install a ceiling medallion at the same time). For smoke detectors and vents, measure carefully and cut a clean opening with a utility knife or jigsaw before applying adhesive.

Written by
Margaret K.
Home renovation writer with 11 years covering interior design and DIY decor projects
Margaret has spent over a decade writing about home renovation and interior design for Canadian homeowners. She specializes in ceiling and wall treatments, with a particular focus on DIY-friendly solutions that transform spaces without major construction. Her work has appeared in home decor blogs and renovation guides across North America.