 Largest Ceiling
  CALL :
  About us
 FAQs
FAQs Gallery
 Contact


 Ceiling Planks
 2×2 PVC Ceiling Tiles
 Styrofoam Ceiling Tiles
 Wall Mural
 3D Wall Panels
 Crown Moldings
 Faux Wood Beams
 Other Products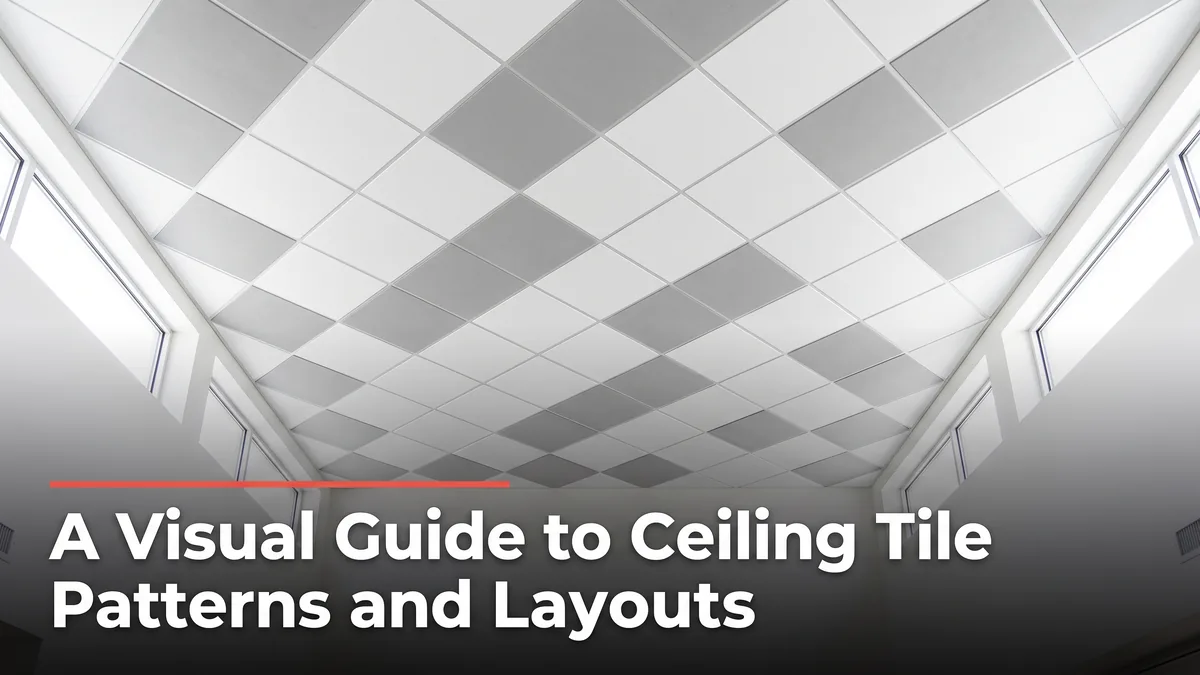
A Visual Guide to Ceiling Tile Patterns and Layouts
The most common question people ask before they buy is which of the many decorative ceiling tiles to choose. The better question is how to lay them out. Ceiling tile patterns change a room more than the tile itself, and the same tile can read as calm and classic or bold and modern depending on the arrangement.
This visual guide walks through the six layouts that do the most work, shows you what each one does to a room, and helps you pick the pattern that fits your ceiling. No demolition, no drywall, just a smarter arrangement of tiles you glue or drop into place.
Why the layout matters as much as the tile
Pick up a single tile and it is just a square with a pattern. Put a hundred of them on a ceiling and the arrangement is what your eye actually reads. The seams, the direction, the repeat, and any color breaks add up to an effect that the individual tile never suggests on its own.
That is good news for your budget. You do not need a fancier tile to get a richer ceiling. You need a smarter layout. A plain white tile in a diagonal grid looks more designed than an ornate tile slapped up in a lazy straight run. The layout is the free upgrade.
Did you know?
The direction of your ceiling pattern can change how big a room feels. Running planks or a diagonal grid along the longer dimension of a room stretches it visually, while a tight straight grid can make a low ceiling feel calmer and more contained. Designers use this trick constantly, and it costs nothing but a little planning before you start gluing.

Straight grid vs diagonal: the two starting points
Almost every ceiling tile layout begins as one of two choices. Get this decision right and the rest falls into place.
Straight grid
Tiles sit square to the walls, seams running parallel to the room. It is the calmest, most classic look and the most forgiving to install, because the grid lines up with the edges of the room. If your ceiling is not perfectly square, a straight grid also hides that better than any angled pattern. Reach for it in bedrooms, offices, and any room where you want the ceiling to feel quiet.
Diagonal or diamond
Turn every tile 45 degrees and the seams form X shapes across the ceiling. Suddenly the same tile looks dynamic and custom. The diagonal grid draws the eye outward and makes a small or narrow room feel wider. The tradeoff is more cut tiles around the edges, so order extra and expect a bit more work.

People often ask: is diagonal harder to install?
A little, but not much. The tiles themselves go up the same way, whether you glue them or drop them into a grid. The extra work is at the edges, where diagonal layouts produce more triangular cut pieces than a straight grid. Snap a clear center line first, work outward from the middle, and cut as you go. Order 10 to 15 percent more tiles to cover the cuts and you will barely notice the difference.
Statement layouts: coffered, checkerboard, herringbone
Once you are comfortable with the basics, three layouts turn a ceiling into the best feature in the room.
The coffered look
Frame a field of lighter tiles with a border row of darker ones and you fake an architectural coffered ceiling for a fraction of the cost of real millwork. Add crown molding at the edges and the illusion is convincing from the floor. This is the single highest-impact trick with decorative tiles, and it works in living rooms, dining rooms, and entryways.

Two-tone checkerboard
Alternate light and dark tiles for a bold, graphic statement. Checkerboard is not subtle, so it belongs in larger rooms or under higher ceilings where it has room to breathe. In a home bar, a games room, or a dramatic dining room, it turns the ceiling into the conversation piece.
Herringbone with planks
Switch from square tiles to ceiling planks laid in a herringbone pattern and you get a woven, directional effect with real warmth. It reads as high-end woodwork and pulls the eye down the length of the room. It takes the most planning of any layout here, so it is worth practicing your angle cuts on a few offcuts first.
Pro tip
Before you commit to a statement layout, tape a few sheets of paper in the pattern on your ceiling, or lay the tiles out on the floor in the arrangement you are considering. Standing back and looking at the real proportions in your real room saves you from ordering a bold checkerboard that overwhelms a small space. Five minutes of mockup beats a weekend of regret.
Which pattern fits which room
The right ceiling tile pattern depends on the room’s size, height, and mood. Here is a quick map.
| Room | Best layout | Why it works |
|---|---|---|
| Bedroom | Straight grid | Calm and restful, keeps the room quiet |
| Small or narrow room | Diagonal | Makes the space feel wider |
| Living or dining room | Coffered look | Architectural feature without the cost |
| Home bar or games room | Checkerboard | Bold and playful, a real talking point |
| Entryway or hallway | Herringbone planks | Directional, draws you down the space |
None of these are rules, they are starting points. The best ceiling is the one that matches how you use the room and the mood you want when you walk in.
Save your money
You do not have to redo the whole ceiling to get a designer effect. A single coffered feature over a dining table, or a diagonal grid in just one room, delivers most of the visual payoff at a fraction of the tile count. Start with the room people gather in and let the rest of the house stay simple.
How to plan your layout before you buy
A great pattern falls apart if the tiles land wrong at the walls. Two steps prevent that.
- Find and mark your center. Measure to the middle of the ceiling and snap a center line. Laying tiles out from the middle means any cut tiles land evenly at both walls instead of one wide row and one sliver.
- Dry-lay the pattern on the floor. Arrange a section of your chosen layout on the floor first so you can see the repeat and the color breaks at full size before anything is permanent.
- Measure the room and order extra. Work out your square footage, then add 10 percent for a straight grid and 15 percent for diagonal or herringbone to cover cuts and future repairs.
- Check your fixtures. Note where lights, vents, and any ceiling medallion sit so you can center the pattern around them rather than fighting them halfway through.
The fastest way to nail the numbers is the free ceiling tile calculator. Enter your room size and it tells you how many tiles to order, so you buy once and finish the job without a mid-project supply run. For a smooth install, the glue-up PVC tile installation guide walks through the whole process.
Download the free layout guide
Save all six layouts and the planning checklist as a PDF to keep beside you while you shop.
Ceiling tile patterns and layouts, free PDF guideFrequently asked questions
Found the layout you love? Browse the full range of decorative ceiling tiles and matching ceiling planks, then plan your order with the ceiling tile calculator. Talissa Decor ships across Canada and the United States, from Hamilton and Calgary to New York and Salt Lake City, so your new ceiling pattern is ready whenever you are.