 Largest Ceiling
 CALL :
 About us
 FAQs
 Gallery
 Contact



 Ceiling Planks
 2×2 PVC Ceiling Tiles
 Styrofoam Ceiling Tiles
 Wall Mural
 3D Wall Panels
 Crown Moldings
 Faux Wood Beams
 Other Products

How to Transition Between 3D Wall Panels and Ceiling Tiles Seamlessly
Where does a 3D wall panel installation actually stop, and where does a ceiling tile installation begin? That question comes up on almost every room that pairs decorative wall panels with a matching or contrasting ceiling tile, and the honest answer is that a clean wall panel to ceiling tile transition is mostly a trim decision, not a mystery. Our step-by-step installation guides walk through each product on its own. This piece is about the seam where the two meet.
Get that line right and a room reads as one deliberate design instead of two separate projects that happen to share a corner. Skip the planning and even carefully installed panels and tiles can look like they were never meant to sit in the same room.
Planning the wall panel to ceiling tile transition line
A wall panel to ceiling tile transition is the physical seam where a vertical panel installation on the wall meets a horizontal, or vaulted, tile installation overhead. On paper it looks like a single line running around the room. In practice it is usually built from a small stack of parts: the last row of panels or tiles on each surface, a strip of trim or moulding that bridges the two, and whatever adhesive or fastening method is holding each product to its own substrate. Treating that seam as one planning decision, made before either surface goes up, is what keeps a two-material room from looking like two unrelated projects pushed together at the last minute.
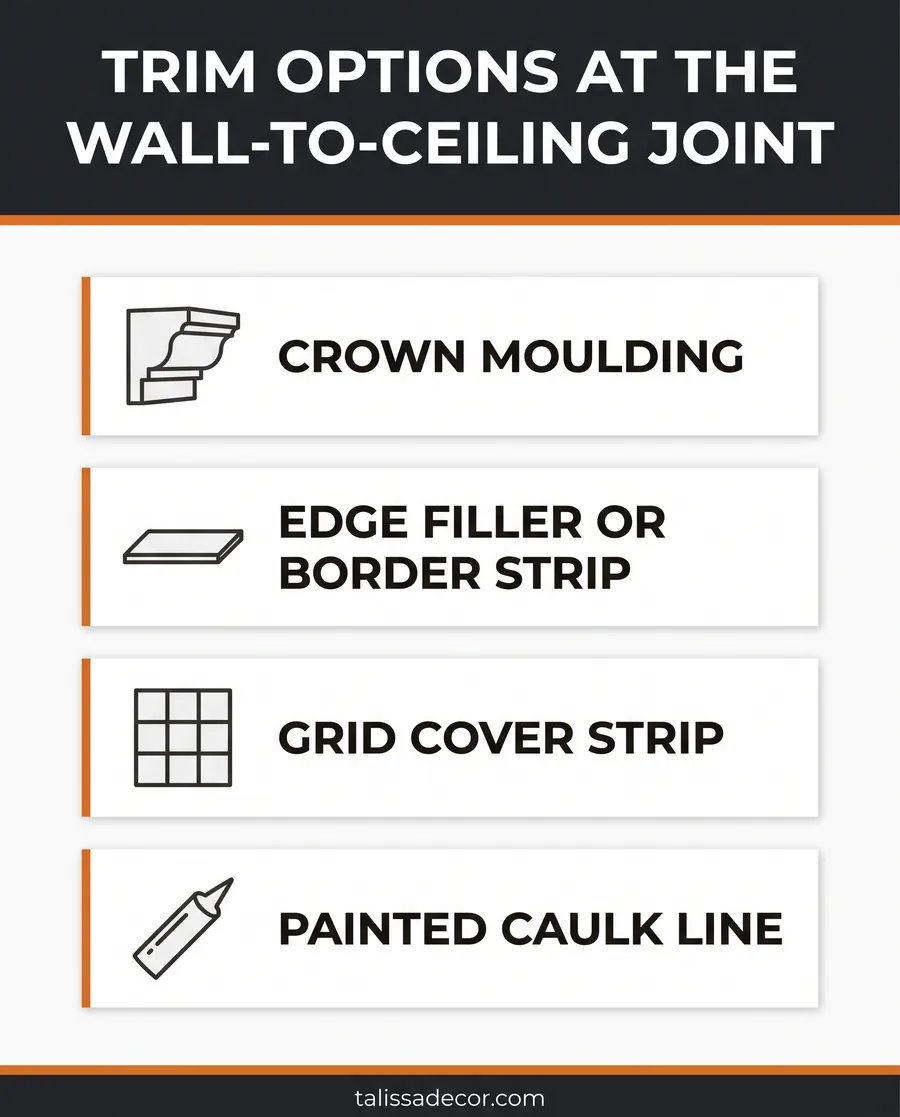
Talissa’s own trim hardware exists mainly to solve this kind of joint. Edge filler and border strips finish the outer edge of a glue-up tile field, and grid cover strips and clips hide the mounting grid on a drop-style ceiling. Neither one is built specifically for a wall-to-ceiling junction, but both are the closest off-the-shelf answer to a raw edge, and a length of crown moulding or a painted caulk line usually finishes what they cannot.
How the transition actually holds together
Wall panels and ceiling tiles are usually two different products attached to two different substrates, and the transition line has to account for both. A 3D wall panel is typically adhered directly to drywall or a similarly flat wall substrate. A styrofoam or PVC ceiling tile is either glued directly to a flat ceiling or dropped into a suspended grid, depending on the product. Where the two meet, the trim piece does double duty: hiding the raw edge of each material and absorbing the small dimensional differences between a wall panel’s face profile and a ceiling tile’s thickness, which are rarely identical.
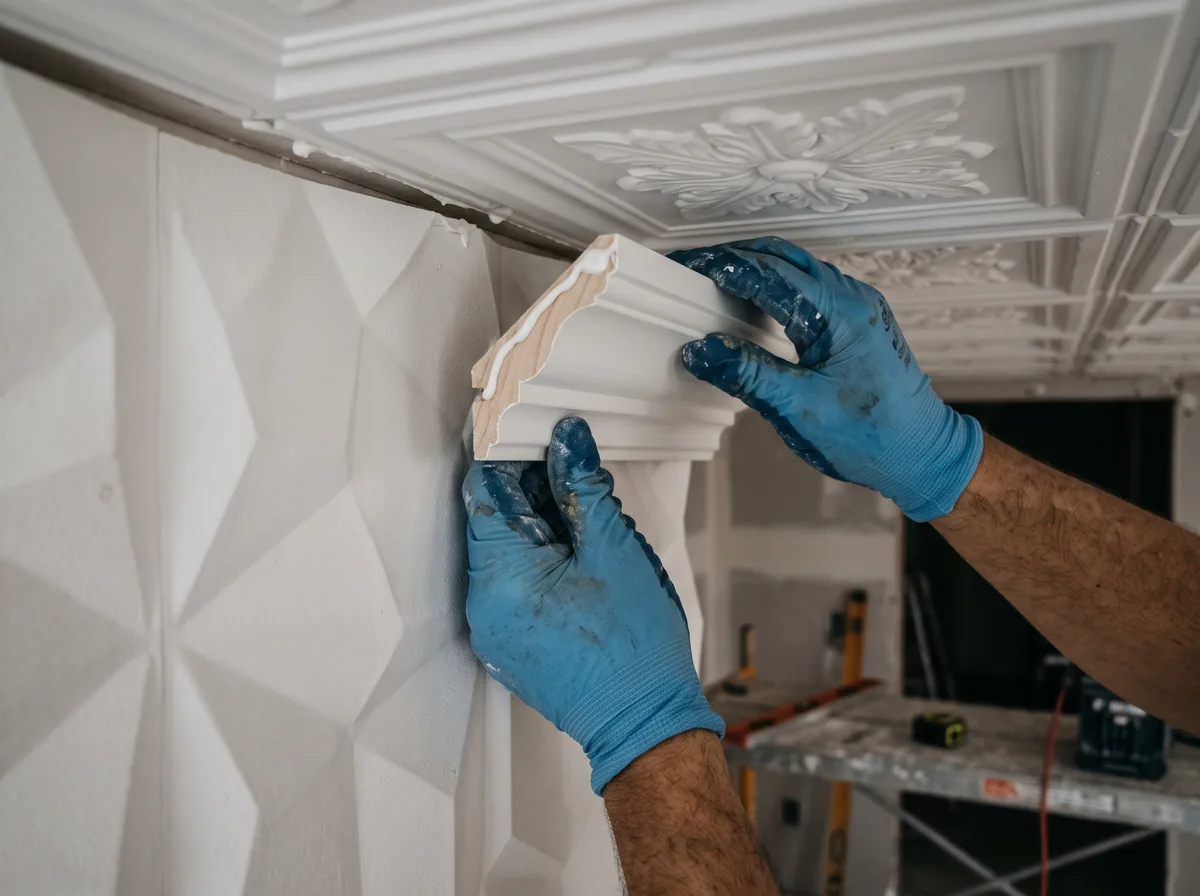
Getting that bridge right is mostly a measuring and sequencing question, not a chemistry one: which surface goes up first, how much reveal the trim needs on each side, and whether the corner is a true right angle or slightly out of square, which most rooms are.
Who this detail is a good fit for
Combining panels and tile on the wall and ceiling of the same room reads best as a deliberate feature: an accent wall in a living room or bedroom that continues onto a section of ceiling, a bar or salon where the wall behind the counter and the ceiling above it are meant to feel like one design gesture, or a small office reception area where a ceiling tile pattern echoes the wall panel below it. It also suits a homeowner or DIYer who is already comfortable cutting and fitting trim, since the transition line is where most of the fine adjustment happens.
When to skip a hard transition line
A single, continuous trim line is not always the right call. A ceiling with a steep vault or several planes complicates a straight moulding run enough that it is often worth having an installer look at the room before committing to a specific product pairing. Two strongly patterned products, an ornate 3D wall panel meeting a heavily textured tile, can compete with each other instead of complementing, so a plainer ceiling tile or a simple painted transition strip is often the easier fix. A wall or ceiling that is visibly out of square is a cosmetic detail to plan around only when the surface itself is sound; a wall or ceiling with active moisture, sagging drywall, or suspected structural damage needs that problem addressed by a qualified professional first, not covered over with a panel.
Did you know
Very few rooms are built perfectly square. A quick check with a speed square at each corner before ordering trim can save a second trip for a piece cut assuming a true right angle that the actual corner does not have.
How to combine wall panels and ceiling tiles cleanly
A handful of sequencing choices make the difference between a transition that reads as intentional and one that looks improvised:
- Finish one surface at a time. Most installers complete either the wall panels or the ceiling tiles first, then scribe the trim to whichever surface went up second.
- Match the finish family, not necessarily the exact pattern. A wood-look ceiling plank and a wood-look wall panel share tone even when the grain direction differs, which reads as coordinated instead of identical.
- Pick a moulding profile that suits both material thicknesses. Our crown moulding collection covers several profile depths, since a thin PVC panel and a thicker styrofoam tile rarely need the same size trim.
- Use an adhesive the tile manufacturer recommends for that specific substrate, instead of assuming one glue works everywhere; Styro Pro tile adhesive is built for glue-up tile work specifically, not general construction use.
- Order a little more of each product than the plan calls for. Trim pieces at a transition line usually need more cutting and fitting than a straight run, and how much extra material to order covers a simple way to estimate the overage.

People often ask
Whether the same crown moulding already used elsewhere in the room can also serve at the wall panel to ceiling tile transition. Often yes, provided the profile depth suits both materials at the junction. If the existing moulding is unusually deep or shallow, a lighter profile chosen for that one seam generally looks more deliberate than forcing a mismatch to work.
Comparing trim options at the wall-to-ceiling joint
None of these is a universal answer. What suits a formal living room rarely suits a minimalist office, and the room itself usually points to the right option:
| Trim option | What it is | Where it tends to work best |
|---|---|---|
| Crown moulding | A projecting moulding profile that bridges the wall and ceiling planes | Rooms where a visible architectural detail at the junction is part of the look |
| Edge filler or border strip | A flat strip finishing the outer edge of a glue-up tile field | Simpler rooms that call for a low-profile finish over a projecting moulding |
| Grid cover strip | A strip that conceals the metal grid on a suspended ceiling | Drop-ceiling tile installations rather than glue-up panel walls |
| Painted caulk line | A thin bead of paintable caulk run along the seam | Minimalist rooms where no visible trim profile is wanted at all |
Good to know
This guide covers general planning and trim options for combining wall panels and ceiling tiles; it is not a substitute for measuring your own room. Wall and ceiling conditions vary, and a surface with active moisture, sagging drywall, or suspected structural damage should be evaluated by a qualified professional before any panel or tile installation begins. Our installation guides describe how to install each product on its own; confirm trim profiles and adhesive choices with our team before buying for an unusual junction.
Download the free quick guide
A one-page checklist covering what to measure, ask, and check before combining wall panels and ceiling tiles in one room.
Frequently asked questions
Do I need special trim to combine wall panels and ceiling tiles?
Not one specific product. A crown moulding, an edge filler strip, or even a painted caulk line can each work depending on the look wanted. The deciding factor is usually whether the trim’s profile depth suits both materials at the junction, not a single required part.
Should the wall panels or the ceiling tiles go up first?
Most installers finish one full surface, then scribe the trim to whichever surface is completed second. Either order can work; the more irregular of the two surfaces is often finished first so the trim has room to absorb its variation.
Can the same moulding profile be used everywhere in the room?
Sometimes, but a profile sized for one wall’s transition is not automatically right for a ceiling with a different tile thickness. Check the profile depth against both materials at the junction before ordering enough moulding to cover the whole room.
None of this requires reinventing either product. Wall panels and ceiling tiles are each installed the way our own guides describe; the wall panel to ceiling tile transition is simply the one seam that needs a plan before either surface goes up, not after it. Check the corner, pick a trim profile that suits both materials, and decide which surface gets finished first.
If you are weighing wall panel and ceiling tile combinations for a specific room, ordering a small sample kit first is a low-cost way to see finishes side by side before committing to a full room, and our team can talk through options for a junction that does not fit a standard trim profile.