


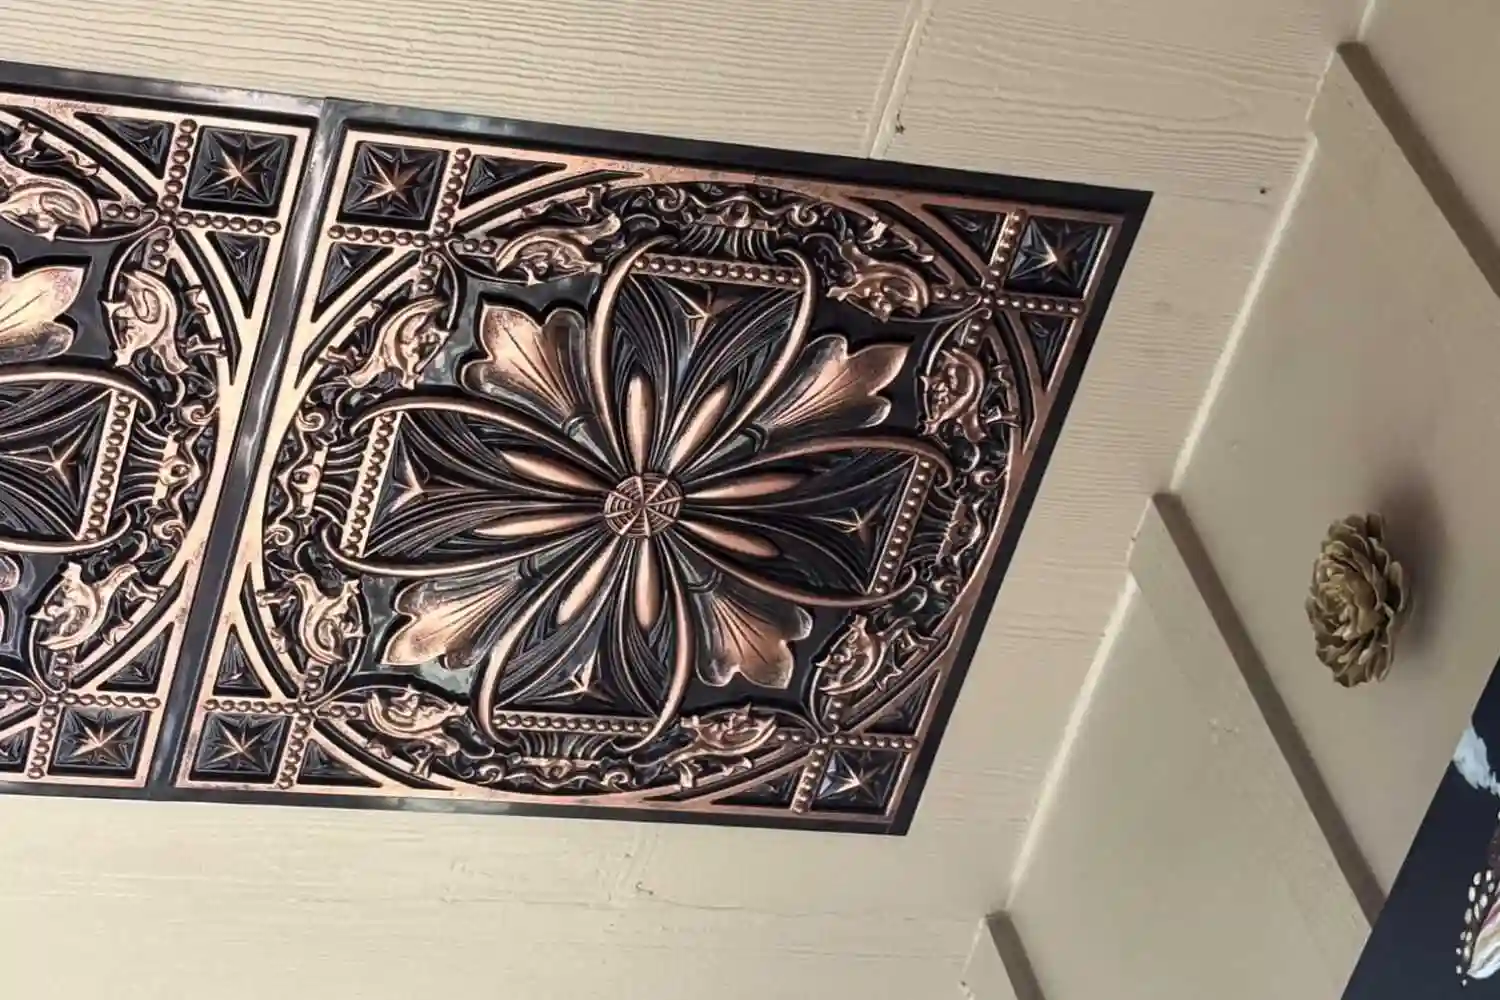
If you’re already planning to install decorative ceiling tiles, it’s easy to assume the process is foolproof. Peel, stick, done — right? Mostly yes, but the few issues that cause sagging corners or tiles popping off usually come down to avoidable setup and installation errors. This guide focuses on the 7 most common mistakes to avoid when installing glue-up ceiling tiles, so you can get a clean, long-lasting result.
I’ve worked with enough first-time DIY installations to see where things typically go wrong. None of these steps are difficult, but knowing them before you start will save you from redoing sections later.
In this article
- Mistake 1: skipping ceiling prep
- Mistake 2: using the wrong adhesive
- Mistake 3: not finding the center of the room
- Mistake 4: rushing the first row
- Mistake 5: forgetting to account for waste
- Mistake 6: ignoring ventilation and fire rating
- Mistake 7: cutting corners on the cuts
- Quick recap before you start
- Frequently asked questions
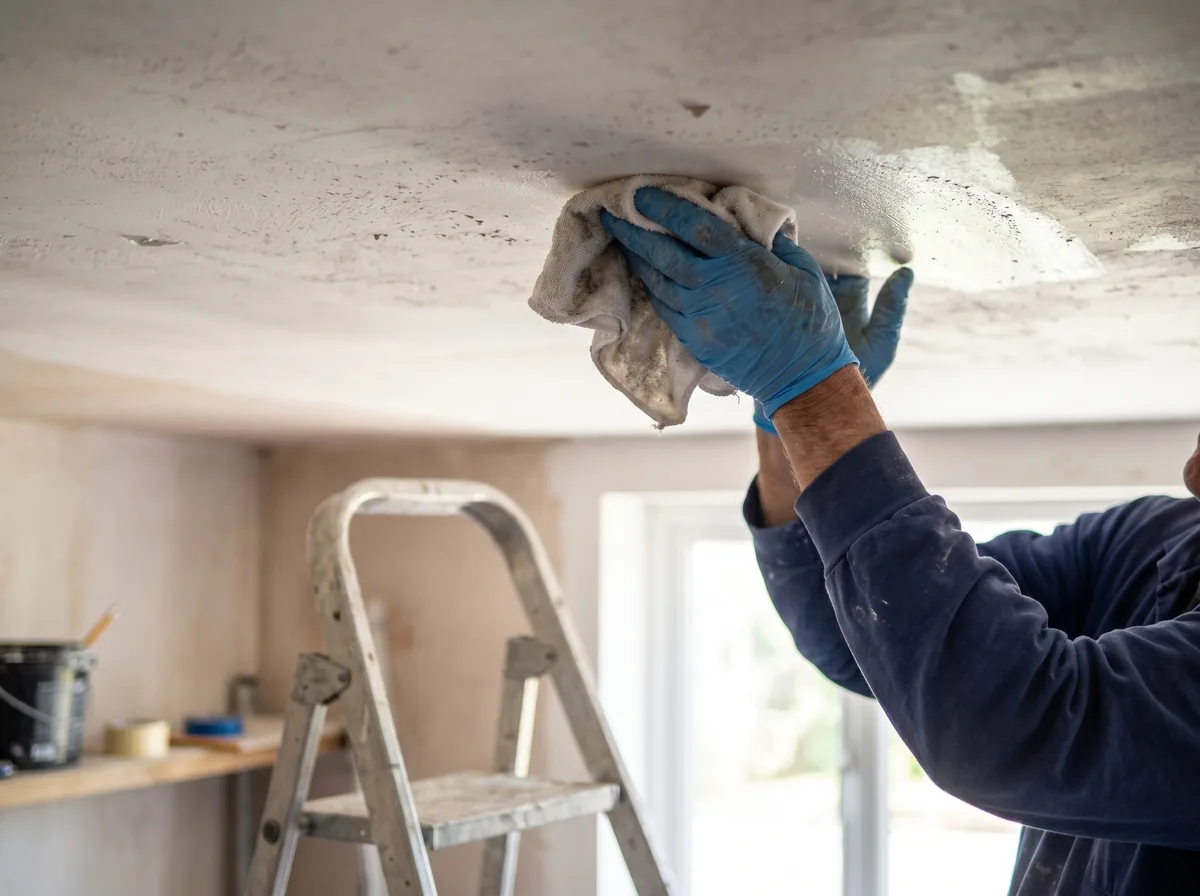
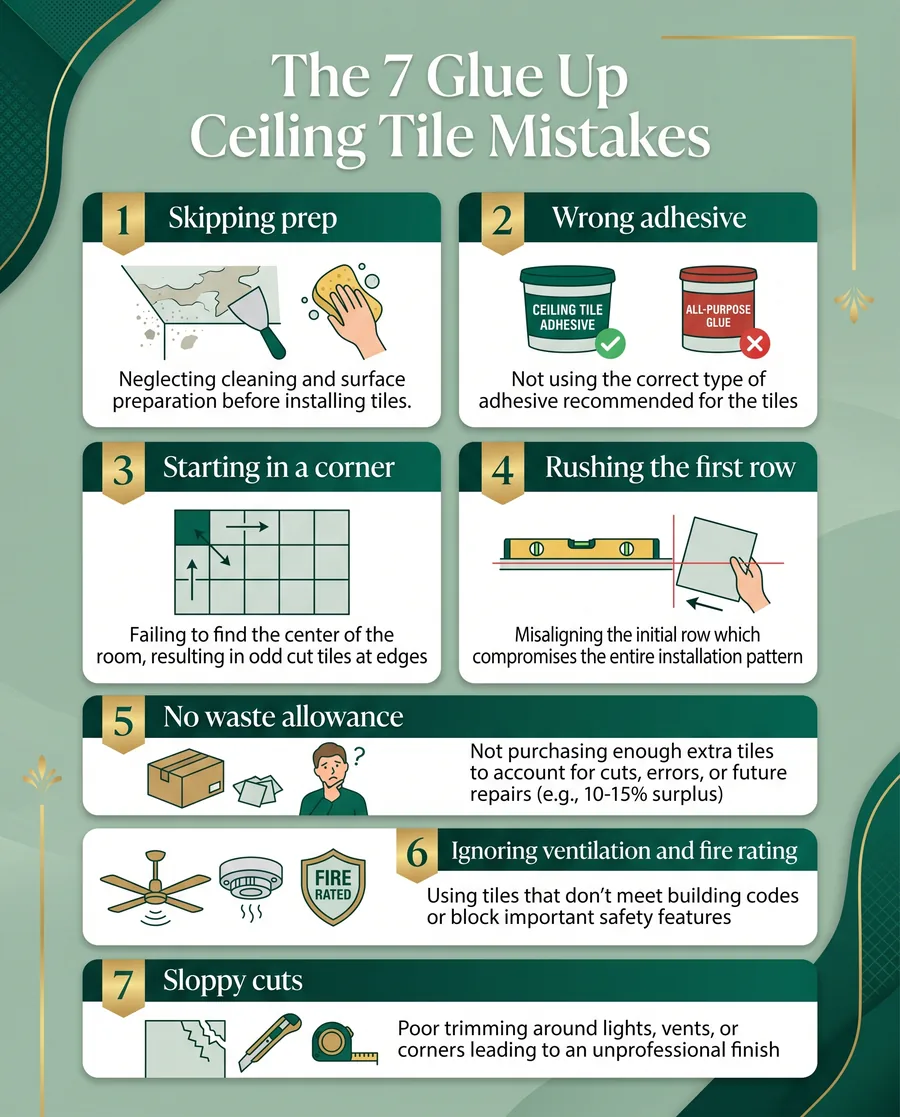
Mistake 1: skipping ceiling prep
Glue needs something clean and sound to grab. The most common reason a tile lets go later is that it was stuck to dust, grease, flaking paint, or a chalky old surface. Wipe the ceiling down, knock off any loose paint, and make sure the surface is dry before you start. If you are going over a textured or popcorn ceiling, that is a whole technique of its own, and we cover it in our guide to covering a popcorn ceiling with tiles.
Pro tip: do the tape test
Not sure if your old paint will hold? Press a strip of painter’s tape firmly onto the ceiling, then rip it off. If paint comes away with the tape, the surface is not stable enough to glue to, and you will want to scrape and prime first. Sixty seconds now saves you re-doing a whole section later.
Mistake 2: using the wrong adhesive
Please note: The tips here are for general guidance only. Talissa Decor is not responsible for any damage, injury, or cost resulting from action taken based on this content. Adhesives, primers, and tiles vary by product, so always confirm the manufacturer’s specifications, including fire rating and ventilation requirements, and follow your local fire and building codes. If a step is beyond your comfort level, hire a qualified contractor.
This one matters more than people expect. Not every construction glue plays nicely with foam tiles. Some solvent-based adhesives will literally eat into styrofoam and leave dents or melted spots. The safe move is to use an adhesive made for the job, like Styro Pro adhesive, which is formulated to bond decorative tiles without attacking the material.
Red flag: the tile is shrinking or pitting
If you see the back of a tile pitting, dimpling, or shrinking after you apply glue, stop right away. That is the adhesive reacting with the foam. Pull the tile, switch to a foam-safe adhesive, and check the manufacturer’s instructions for the specific tile you bought before going further.
Mistake 3: not finding the center of the room
It is tempting to start in a corner because it feels logical. The problem is that rooms are rarely perfectly square, so starting from a corner leaves you with a lopsided, uneven look on the far walls. Instead, find the center of the ceiling by snapping two chalk lines corner to corner, then work outward from the middle. Your border tiles end up symmetrical on all four sides, which is what makes a ceiling look professionally done.
People often ask: can I install glue up tiles over an existing ceiling?
In most cases, yes, and that is one of the big appeals. Glue up tiles are designed to go directly over drywall, plaster, or even an old textured ceiling, as long as the surface is clean, dry, and stable. You usually do not need to tear anything out. That said, very glossy or heavily damaged ceilings may need priming or a skim first so the adhesive has something reliable to bond to.
Mistake 4: rushing the first row
The first tiles you place set the line for everything that follows. If your starting tiles drift even slightly out of square, that error multiplies across the room, and by the far wall the gaps are obvious. Take your time aligning the first few tiles to your chalk lines. Check them against each other for tight, even seams. Once the opening rows are dead straight, the rest of the ceiling almost installs itself.
- Dry-lay first. Set a few tiles in place without glue to confirm your layout and seams before you commit.
- Press, do not slide. Position each tile and press it straight up. Sliding a glued tile smears adhesive into the seams.
- Wipe as you go. Keep a damp cloth handy for any adhesive that squeezes out at the joints.
Mistake 5: forgetting to account for waste
Border tiles get cut, mistakes happen, and the occasional tile arrives damaged. If you order the exact square footage of your room, you will run short partway through and have to wait on a second shipment, sometimes from a different batch with a slightly different shade. Order extra from the start. The small overage is far cheaper than a stalled project.
| Room situation | Suggested extra to order | Why |
|---|---|---|
| Simple square or rectangular room | Add about 10 percent | Covers border cuts and a few errors |
| Room with angles, beams, or fixtures | Add about 15 percent | More cuts means more offcuts you cannot reuse |
| First time installing tiles | Add about 15 percent | Practice cuts and learning-curve mistakes happen |
| Matching an existing area later | Buy spares now | Future stock may be a slightly different dye lot |
Need a hand estimating? Browse the full range in our ceiling tiles collection and use the coverage info on each product to size your order with a sensible buffer.
Mistake 6: ignoring ventilation and fire rating
Two things people skip in the excitement of a quick project: ventilation while gluing, and the fire rating of the tiles themselves. Adhesives can give off fumes, so open windows and keep air moving while you work. And if you are tiling a kitchen, a commercial space, or anywhere fire safety is a concern, check the tile’s rating. Talissa offers styrofoam ceiling tiles in fire-rated options, but you should always confirm the specific rating against your local fire code before installing.
This is general guidance, not a code ruling. Fire and building codes vary by region and by the type of room, so when in doubt, ask your local building authority or a qualified contractor.
Mistake 7: cutting corners on the cuts
Border and obstacle cuts are where a ceiling looks either tidy or rough. The good news is that foam and PVC tiles cut easily with a sharp utility knife and a straightedge, no power tools needed. The bad news is that a dull blade tears the foam and leaves ragged edges. Change blades often, measure twice, and cut on a firm flat surface. For fixtures and vents, make a paper template first, then trace it onto the tile.
Sources and further reading
- Talissa Decor installation guides and product instructions for glue up ceiling tiles.
- Talissa Decor, “How to Install Ceiling Tiles with Glue (Styro Pro)” (video, embedded above).
- General DIY ceiling-installation best practice for surface prep, layout, and waste planning.
Frequently asked questions
How long does glue up ceiling tile adhesive take to set?
It depends on the adhesive and the room conditions, but most foam-safe construction adhesives grab within a few minutes and reach a full cure over 24 to 48 hours. During the first few minutes you can still nudge a tile into perfect alignment, which is exactly why you should not slide it hard once it is down. Keep the room ventilated and avoid bumping the tiles while they set. Always follow the cure time printed on your specific adhesive, since temperature and humidity can lengthen it.
Can I install glue up ceiling tiles by myself?
Yes, this is genuinely a one-person job for most rooms, which is a big part of why glue up tiles are popular with DIYers. You will find a few sections easier with a helper to hold tiles or check alignment, but it is not required. A sturdy step stool or ladder, a utility knife, a straightedge, and chalk lines are the main tools. Work in good light, take breaks, and do not rush the first row. The job is more about patience than strength.
Do I need to remove my old ceiling first?
Usually not. One of the main advantages of glue up tiles is that they go directly over an existing ceiling, including drywall, plaster, and many textured or popcorn ceilings, so you avoid a messy tear-out. The surface just needs to be clean, dry, and stable enough to hold adhesive. If the old ceiling is flaking, very glossy, or badly damaged, prep it first with scraping, priming, or a skim coat so the glue has a reliable surface to bond to.
What is the most common glue up ceiling tile mistake?
Poor surface prep is the one that causes the most tiles to fail down the road. People are eager to start, so they glue tiles onto a dusty, greasy, or flaking ceiling, and the bond never fully takes. A close second is starting in a corner instead of the center of the room, which leaves uneven borders. Both are easy to avoid: clean and test the surface first, then snap chalk lines and work outward from the middle for symmetrical, professional-looking results.
Quick recap before you start
- Prep the ceiling. Clean, dry, and stable, with the tape test if you are unsure.
- Use a foam-safe adhesive and confirm it suits your tile material.
- Start from the center, not a corner, so your borders stay even.
- Take your time on the first row; it sets the whole ceiling.
- Order 10 to 15 percent extra to cover cuts and the odd mistake.
- Ventilate while gluing and check fire ratings against your local code.
- Keep a sharp blade and template tricky cuts around fixtures.
Download the free quick guide
Take our one-page checklist of all seven mistakes (and the fix for each) into the room with you.
Ready to glue up your new ceiling?
Talissa Decor ships decorative ceiling tiles across Canada and the United States. Pick your style from our full shop, grab the right foam-safe adhesive to go with it, or contact our team if you want a hand choosing tiles for your room.

Written by
James O.
DIY home improvement writer with 9 years covering building materials and finishing products
James covers practical home improvement topics for weekend renovators and first-time homeowners. He focuses on material comparisons, installation guides, and cost-benefit analysis to help readers make confident purchasing decisions. He has hands-on experience with most major ceiling and wall panel product categories.